Musical theatre is close to my heart, and figuring out how to make Musical theatre sound effects happen has always been a welcomed challenge for me.
Musical Theatre shows are a great working ground for Ableton live. They come packed with lots of different patch changes, and at times, keyboard parts come backed with Sudo-unplayable parts that require the assistance of software to pull off- and of course lots of musical theatre sound effects.
When I first started programming keyboard for musicals, I used mainstage, which seems to be industry standard for this genre. Unfortunately, It always cracked under the pressure of extensive programming.
This was one of the causes of me moving to Ableton.
If you’re going through the same thing, make sure you grab a copy of my Mainstage To Ableton E-Course to make the transition smooth and fast.
Musical Theatre Sound Effects
This summer, I am working on a production of Shrek Jr. I had all intentions of performing this show on an acoustic piano, but there was one song, that had timed sound effects.
Not just any sound effects, but farts.
So I had to come up with a plan to play this farting sequence with excellence.
This is what I came up with
Clips, or Drum Racks?
This was the first question I had. Both could work for musical theatre sound effects
And my answer was…
Both.
Audio Clips
I used audio clips for sections of music that I needed to loop. You can hear this in detail on the youtube video.
Because these clips need to be looped indefinitely, using audio clips made the most sense.
Pro Tip: Make sure your global launch quantization is set to none so that your clips start exactly when you cue them.

Drum Racks
I used a drum rack for my farting noises. I did this for a few reasons:
- The farts are written musical part, so I wanted them to feel like an instrument.
- I like the drum rack workflow for adding effects
- Sounds in a drum rack allow you to trigger more than one sound at a time. From a totally practical standpoint, this allowed me to layer sounds without needing to resample.
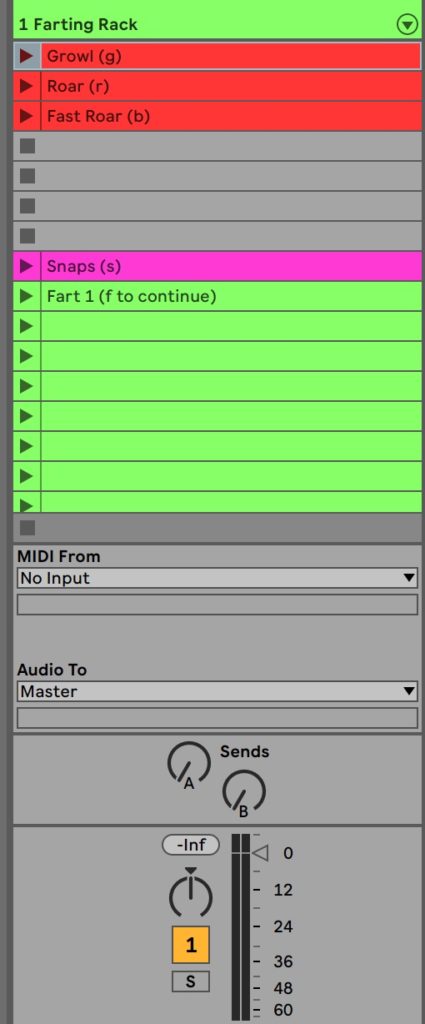
To play these sounds in order with 100% accuracy, I created midi clips for each sample and placed them in order.
Using this method, I was able to just use one button on my controller mapped to the master fire button to scroll through my sounds.

Using the velocity device here, I can ensure all my sounds are the same volume.
Controllers
For a musical theatre production, it is distracting to see a computer screen from the audience. In order to decrease the appearance of the computerized components of the show, I wanted to use a pad controller to trigger the sound effects
The Behringer Touch CMD TC64
I love this controller, but the truth is, it is a knock off of the Novation LaunchPad.
I highly recommend both of these controllers for launching clips, however, the TC 64 is very difficult to find.
If you want to get your hands on a great clip controller for Musical Theatre, I recommend the Novation LaunchPad Mini.

A controller such as this allows you to tuck your computer away, and control all your sounds without needing to check your screen.
Controlling Levels and Audio Effects With The IAC driver
At times, I wanted certain effects to come in without needing to turn any knobs.
To accomplish this, I mapped controls to my IAC driver.
Using this method, One clip can change multiple effects across many channel strips.
Learn to use your IAC driver for global controls here.
What To Do Now?
Now that you’ve mastered sound effects, let’s check out how patch lists work.