If you’re like me, you are constantly making synth sounds. You may also be like me and want to play all of your synth sounds during a live set. Using samples of synths is a great way to lighten the load on the computer, while still scratching the itch to have all your awesome synths loaded and ready to go.
I have come to find that running too many instances of soft-synths live can be a lot for my computer to handle.
In my mainstage days I used to use auto-sampler, and so once I transition to Ableton, I really felt the weight of not having that ability.
Which is why I started using this method. Its saved me a ton of time and allows me to use as many sounds as I want and need during a live set.
This post is a long one, and I highly recommend using it in conjunction with the video. If setting this all up sounds overwhelming to you, don’t worry. I’ve already done it. You can download the sampler template here and get up and running in no time.
For those of you who are ready for an awesome ride, let’s get going.
The Concept
Here was the thinking the led me to this concept.
I want Ableton to…
Automatically and separately record the full range of my instrument in minor thirds across the keyboard with the press of one button.
Automatically order my samples correctly when I load them into Sampler
Quickly and correctly set looping points.
Get to playing
How I Did it
Phase 1:
Automatically and separately record the full range of my instrument in minor thirds across the keyboard with the press of one button.
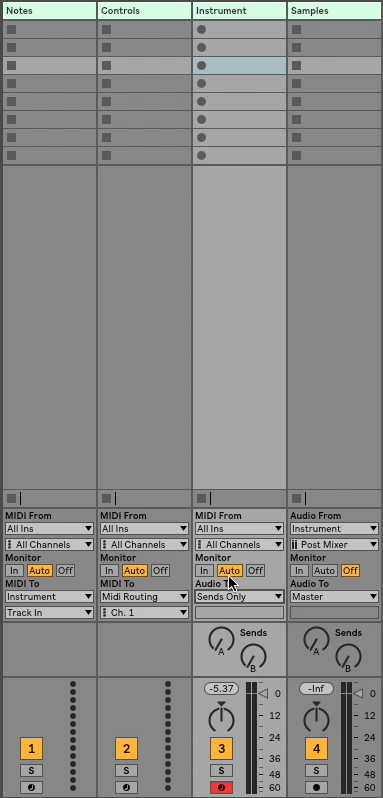
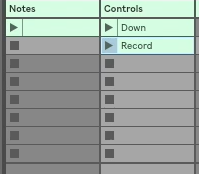
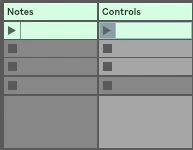
To accomplish this I need 4 Tracks…
Track One: an audio track labeled “Samples”.
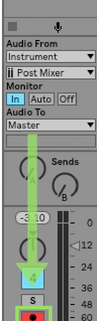
Track Two: A midi track containing the soft-synth you want to sample. The audio output of this track should be set to, “Samples”.
Track Three: A midi track labeled, “Notes”. The midi to of this track should be sent to your soft synth channel.
Track Four: A midi track labeled, “Controls” with midi to set to IAC bus.
Setting Up The Notes Channel
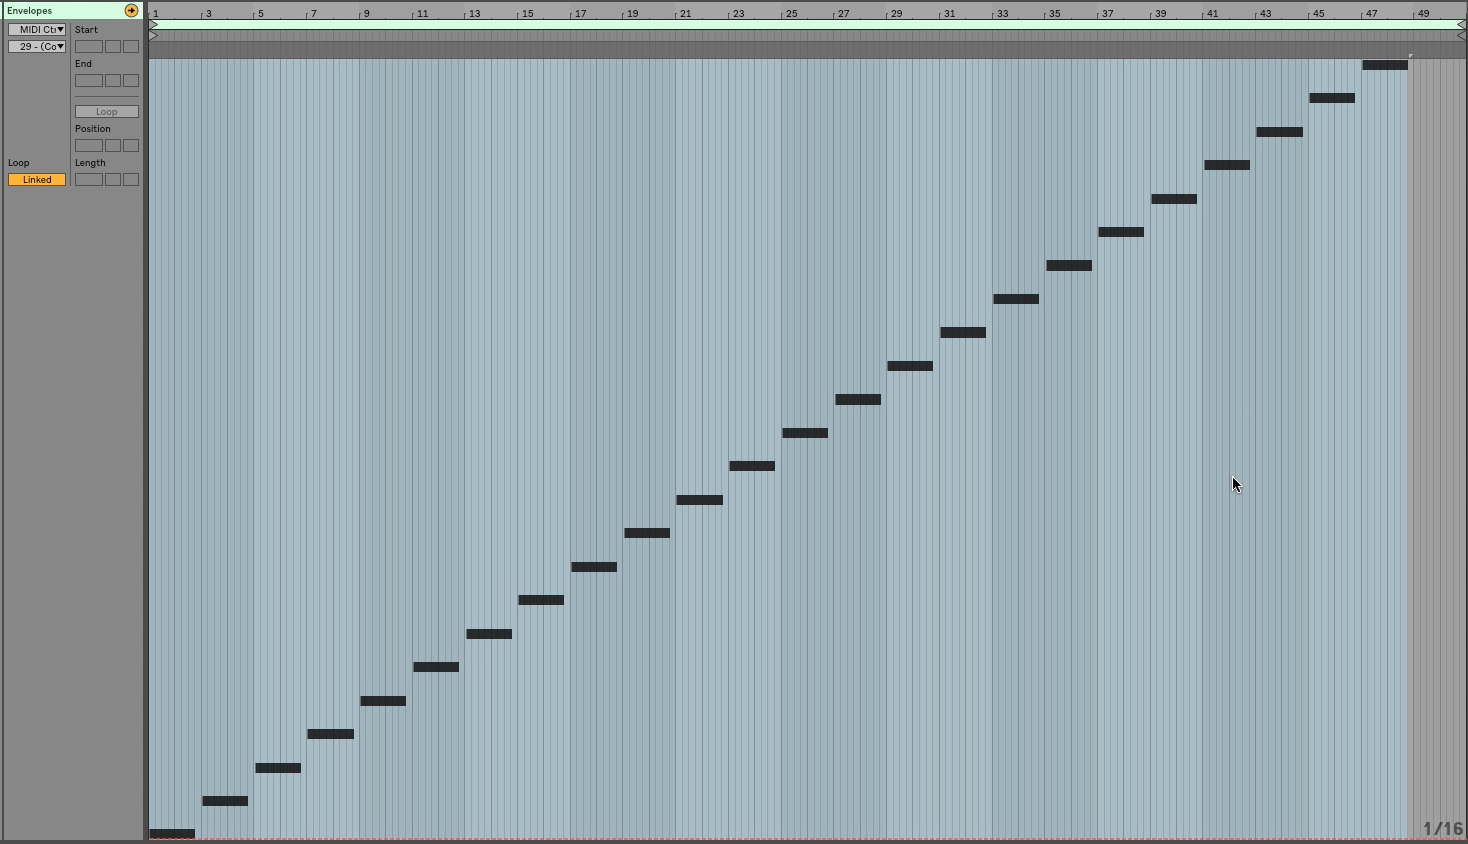
Step 1: Create a blank midi clip in the, “Notes” track.
Step 2: Enter the notes, C1, Eb1, Gb1, and A1 into the midi clip as Quarter notes by double-clicking on the piano roll.
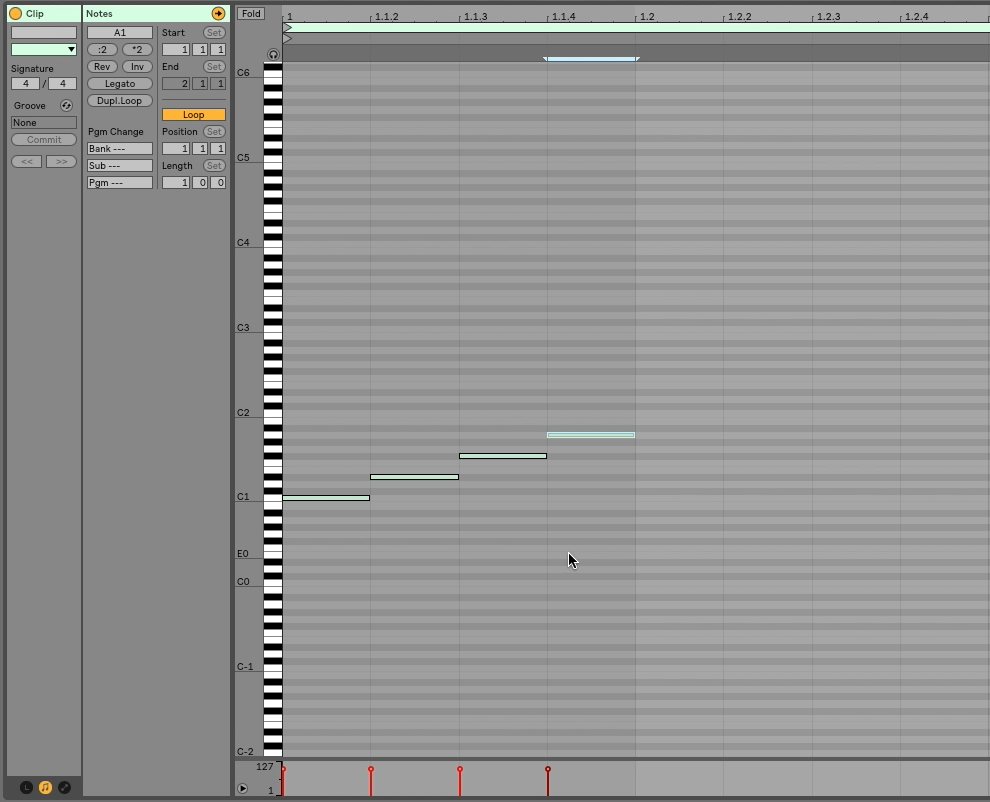
Step 3: Quickly move these to span the whole instrument range by.
- Selecting all 4 beats.
- Pressing Command-D
- Holding down shift and pressing the up arrow
You will notice that Ableton automatically duplicates your measure when you hit Command-D, and transposes it up an octave when you hit the shift- Up keys.
Repeat this till you have covered the entire upper range
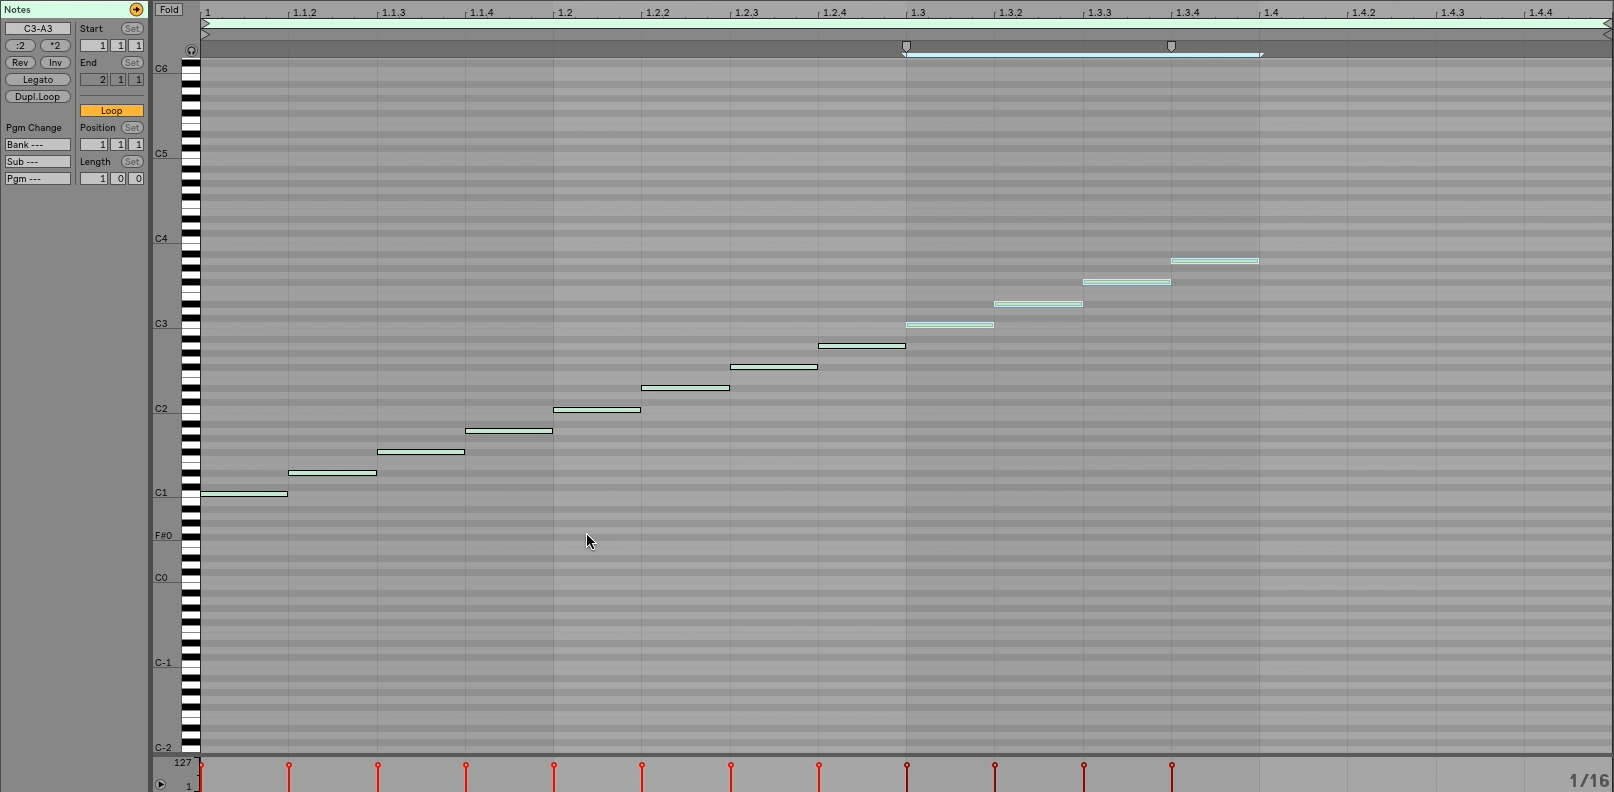
Step 4: Adjust your start marker to -1, and your end marker to the end of the last note in your clip.
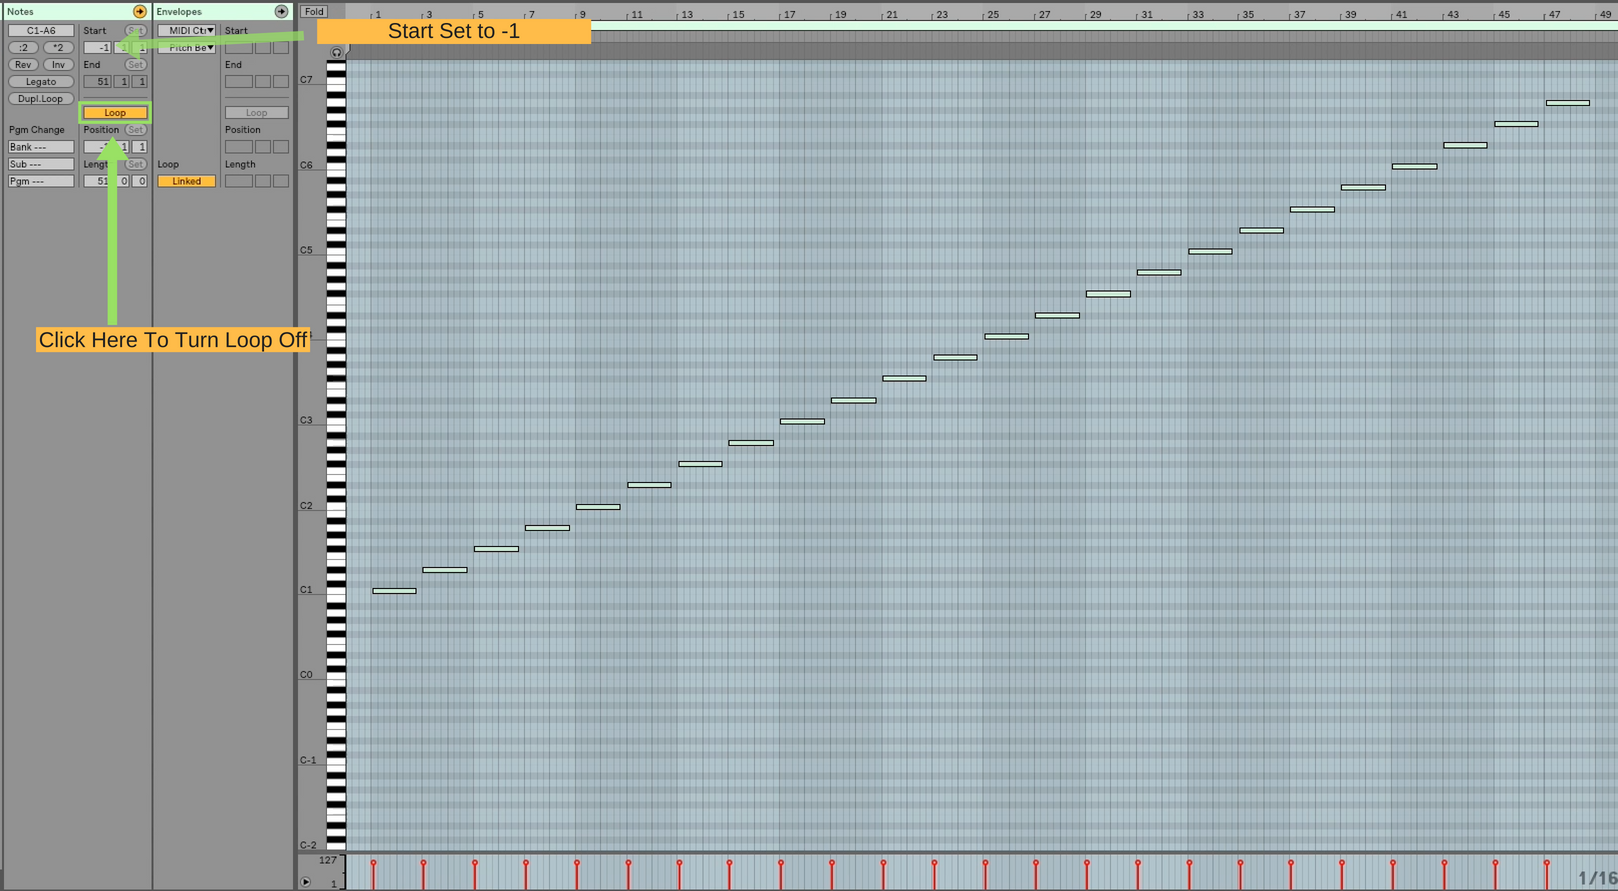
Step 5: Turn looping off.
Step 6: Select all of your notes so by pressing Command-A, and adjust the end of the notes with your mouse to leave a bit of space between them.
This will give Ableton A little bit of space to regroup after recording individual notes
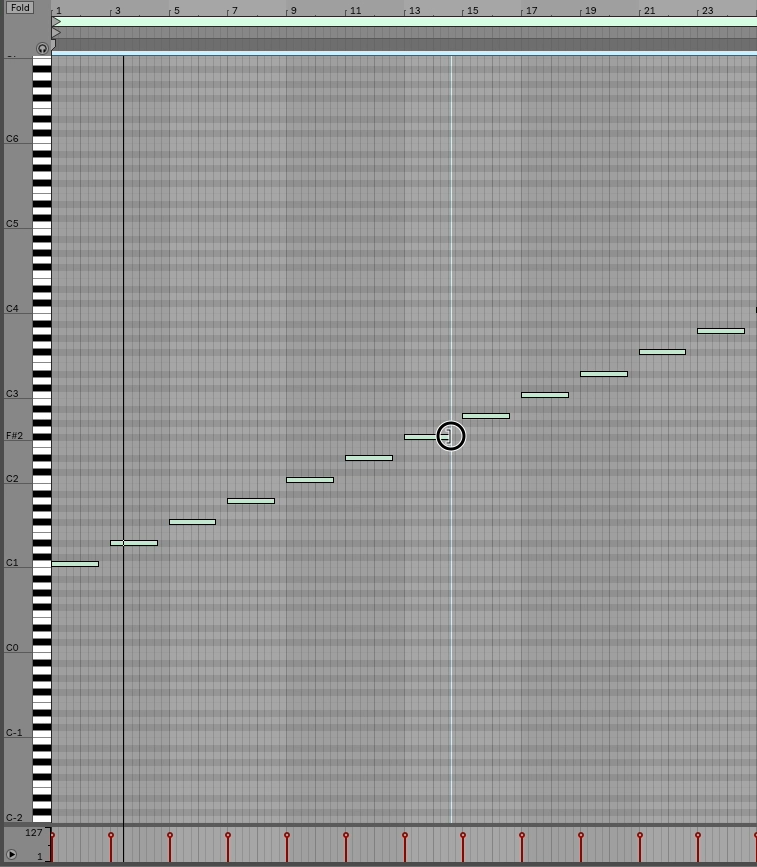
Step 7: With your notes still selected, hold down Command and use the left arrow to nudge the start of your note slightly ahead of the barline. This ensures that Ableton records the attack of your synth.
Setting Up The Record Controls
Step 1: Create A midi clip and label it, “Record”.
Step 2: Create Another Midi Clip and Label it, “Down”.
Step 3: On your record clip, open up the envelope section and choose CC 29. Draw an envelope going from 0-127.
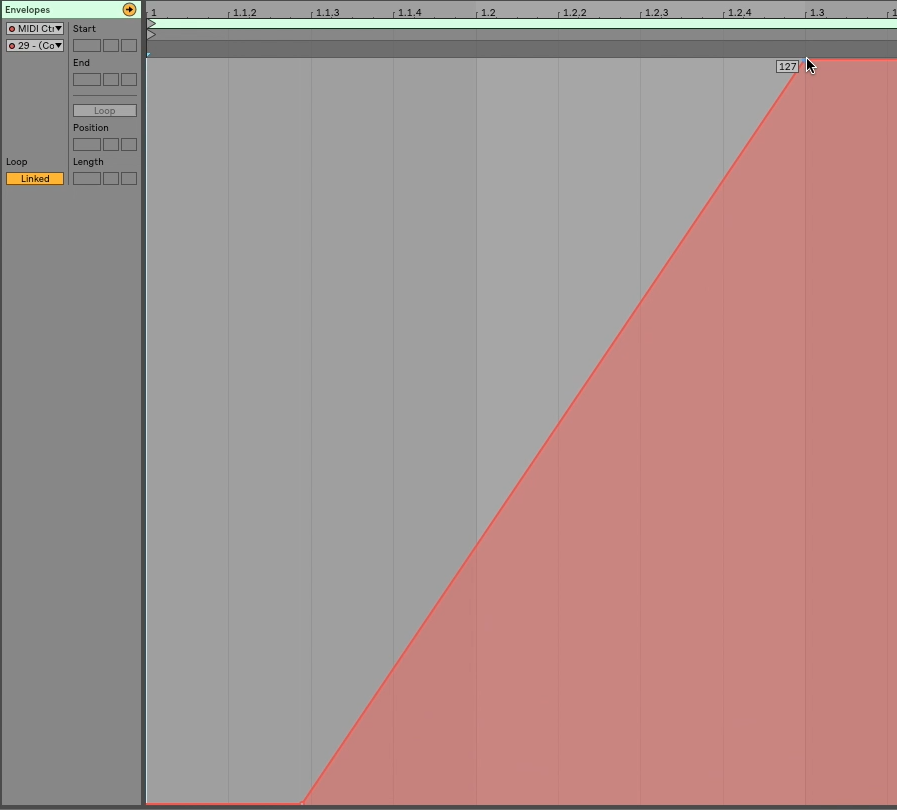
Step 4: Fire that clip
Step 5: Enter midi mapping mode and click on the play button of the samples track. Once it is mapped, exit Midi mapping mode and stop your clip.
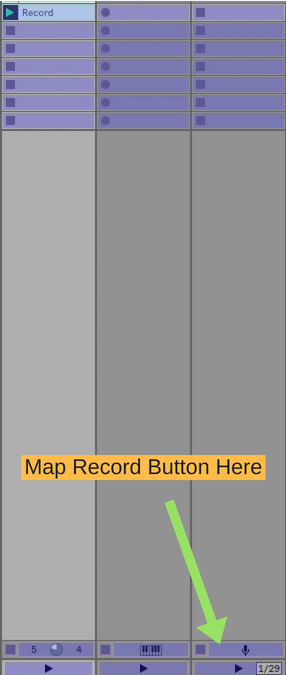
Step 6: On your “next” clip, open up the envelope section and choose CC 28. Draw an envelope going from 0-127.

Step 7: Fire that clip
Step 8: Enter midi mapping mode and click on the “next” button of the samples track. Once it is mapped, exit Midi mapping mode and stop your clip.

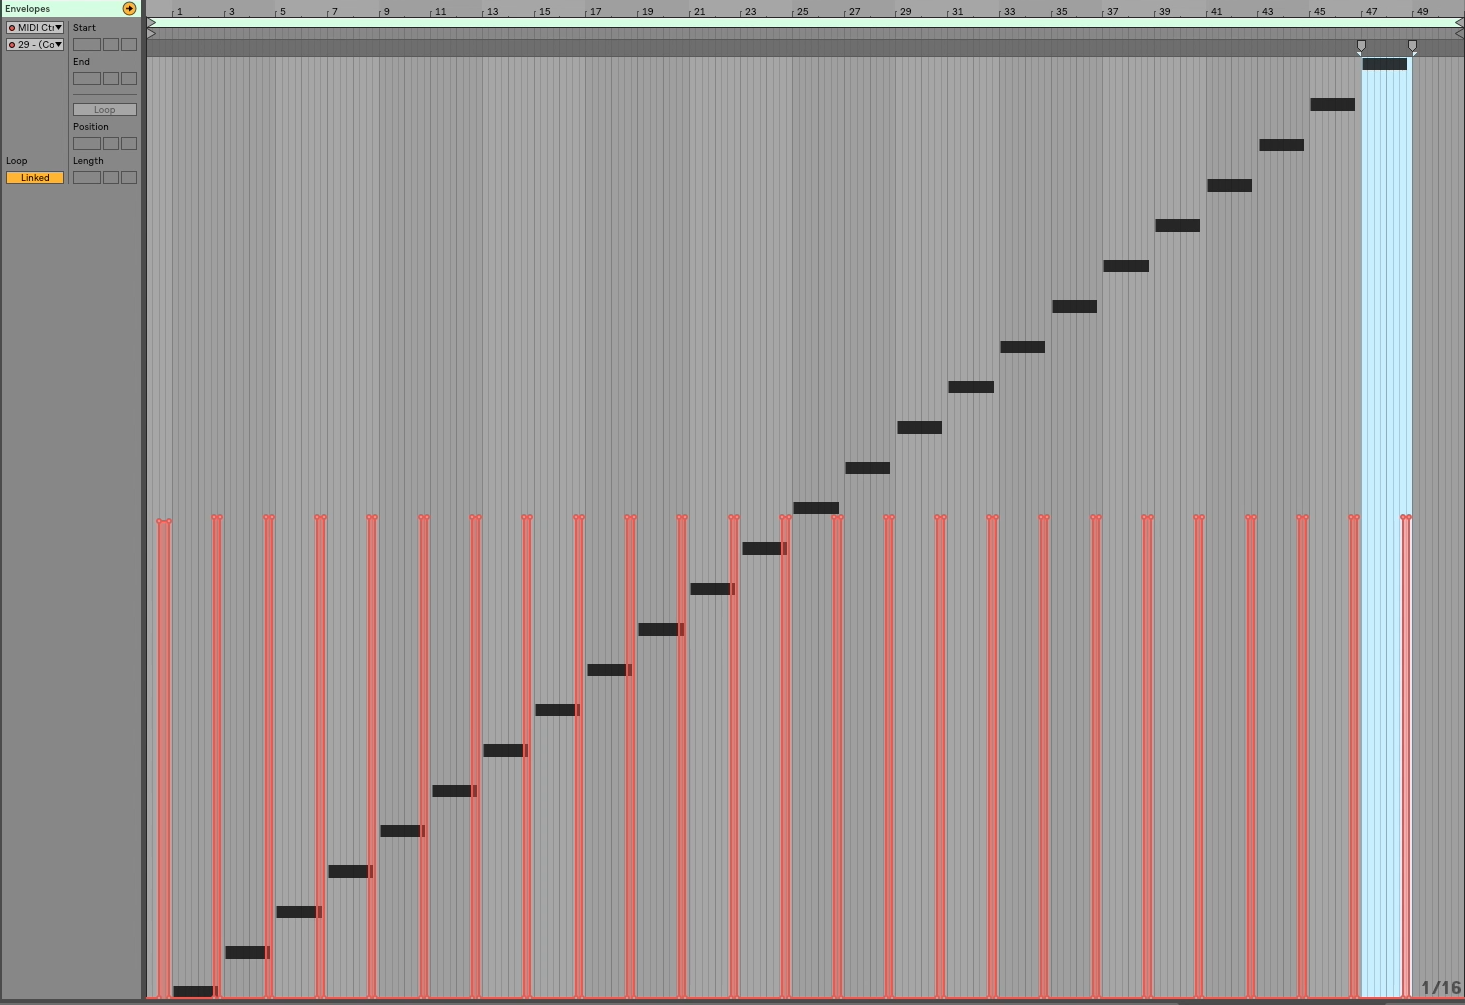
Lining Up Notes And Controls
We will revisit our mapped CC controls in just a minute, but for now, you can delete the record and down clips.
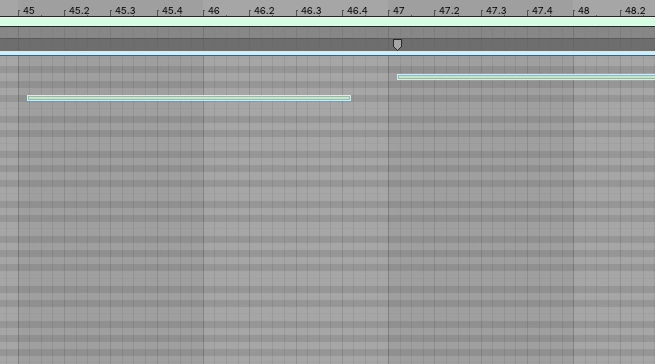
Now we will use these mapped CC’s to move down through the scenes and record one note into each clip. ITs important to understand that we must select the next scene BEFORE we trigger the record command. So when we line up our envelopes, the Record envelope must be slightly after the Next envelope.
With Ableton’s global quantization set to 1 bar, Ableton will start recording right before our note starts playing (Because we offset our notes slightly in the notes clip).
Duplicate your notes clip from the notes channel, and drag a copy to the control channel.
Step 1: Open the envelope section on your control channel of your newly duplicated notes clip.
Step 2: Navigate to CC 28. Just before each note, draw a small square shaped envelope that starts at 0 and goes to 64.
Step 3: Select that beat, and hit command-D until you reach the end of the clip.
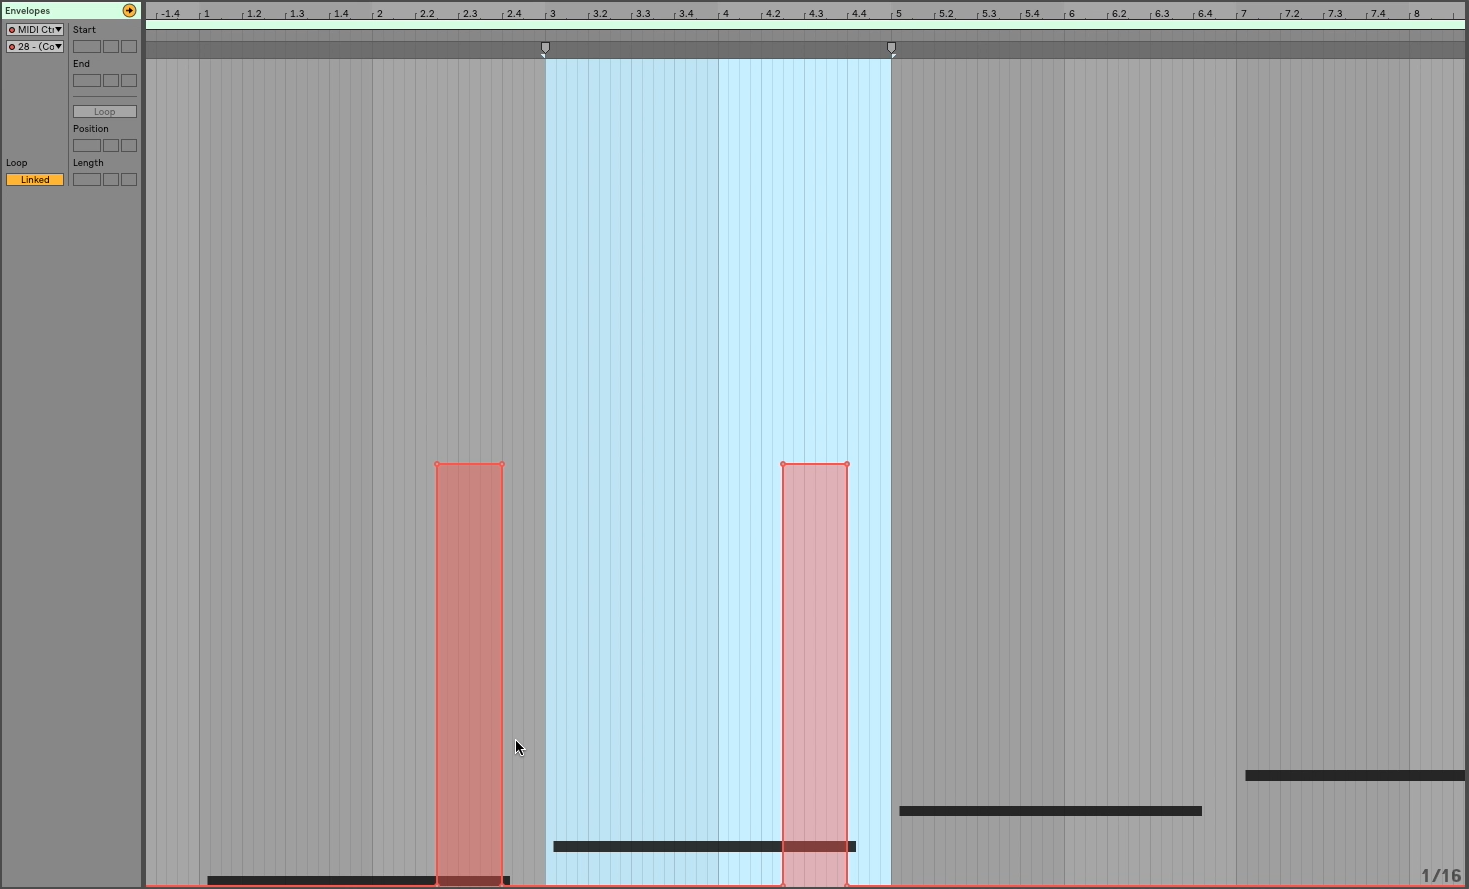
Step 4: Now Choose CC 29. In the middle of your first note, draw another square control envelope that starts at 0 and ends at 64. Select that beat, and duplicate throughout the who clip.
SAVE FOR LATER
This is the hardest part. Save this file as Ableton Sampler, so that next time you want to recreate this, you don’t have to go through all the hard work you just did. You can simply open this set, drop in your synth, and hit play.
Recording
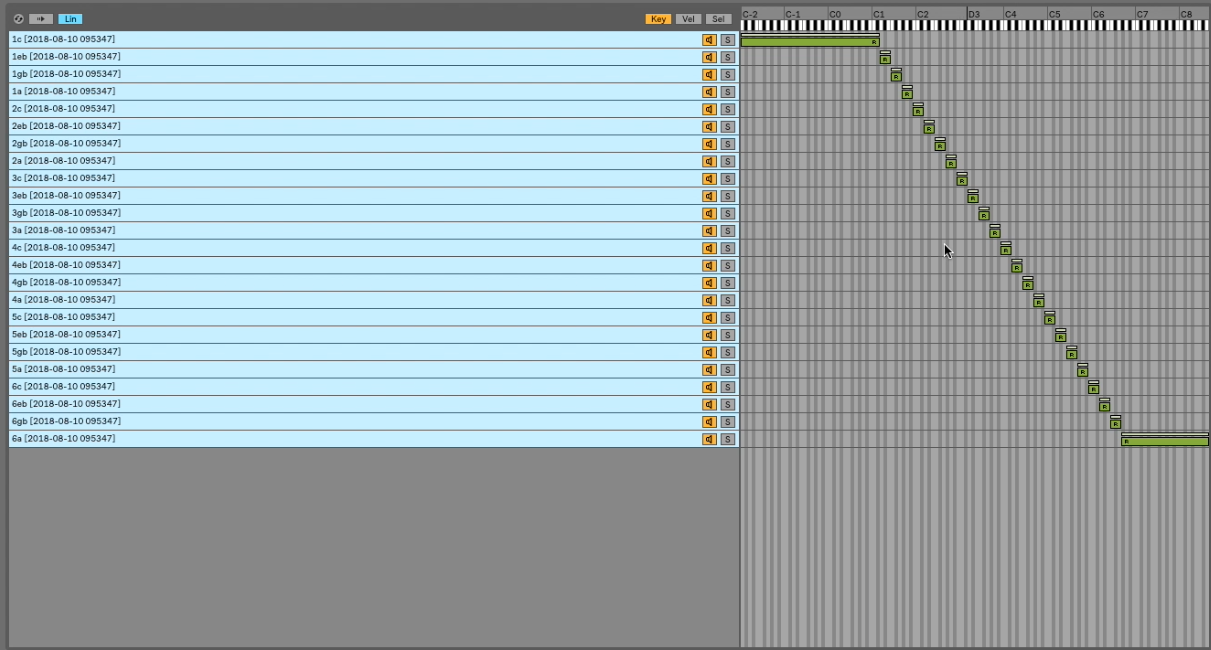
We are about to record 24 notes, so we must make sure that we have 24 scenes in Ableton. You can quickly insert scenes using the shortcut, Command-I
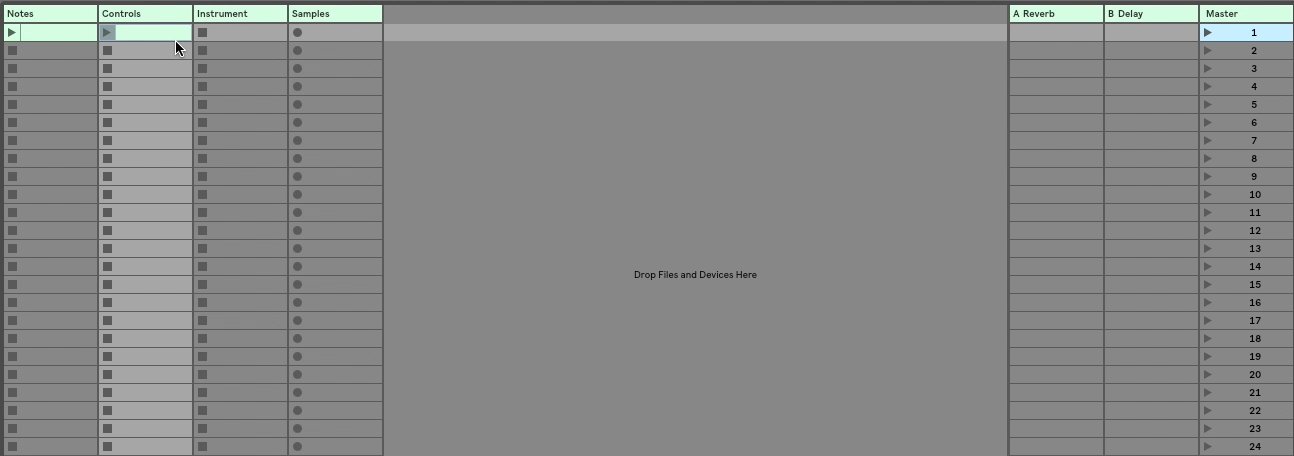
Record Enable your samples track.
Fire the notes clip and the samples clip simultaneously, and let Ableton Automatically record for you.
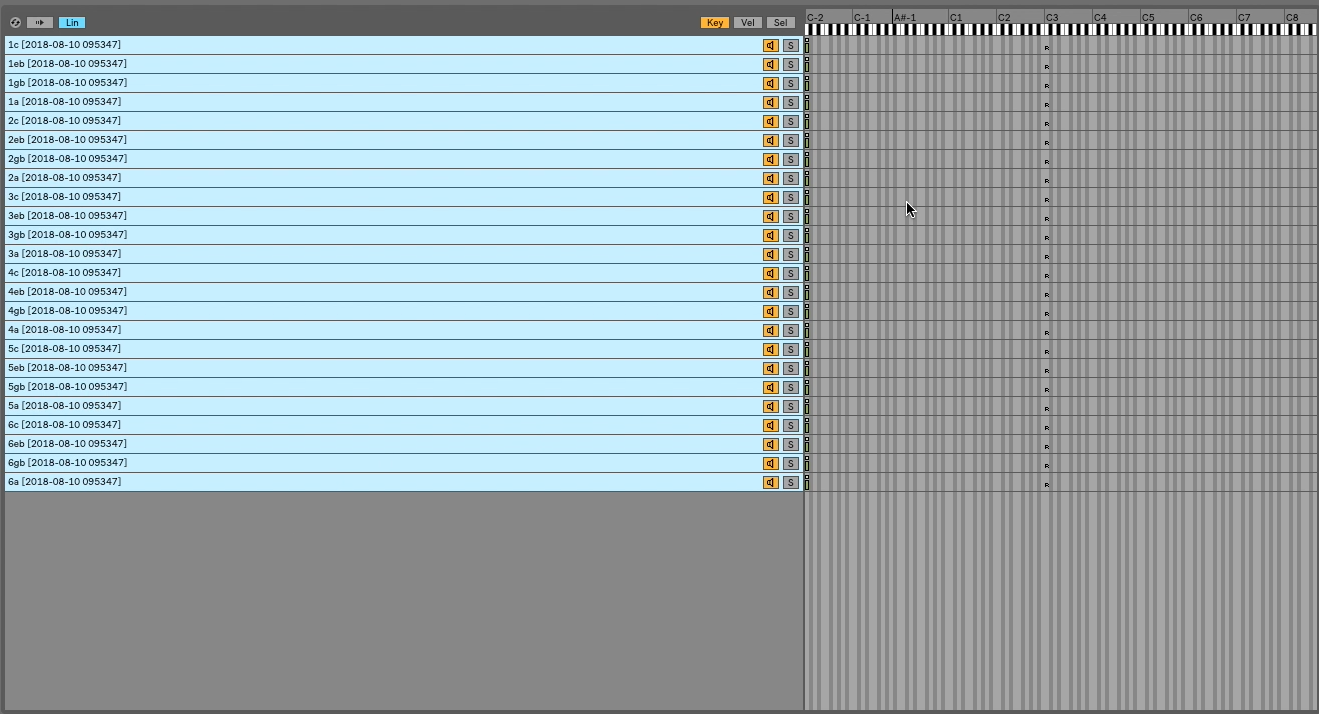
Renaming
Now that we have our notes all recorded in separate clips, we need to rename them. This ensures us of two things:
- That we know which note we are working with in Sampler
- That our notes stay in the correct order when we move them
Rename your clips with the following format:
OctaveNotename
So for Example.
1C, 1Eb, 1Gb, 1A, 2C, 2Eb, 2Gb, 2A
And so on.

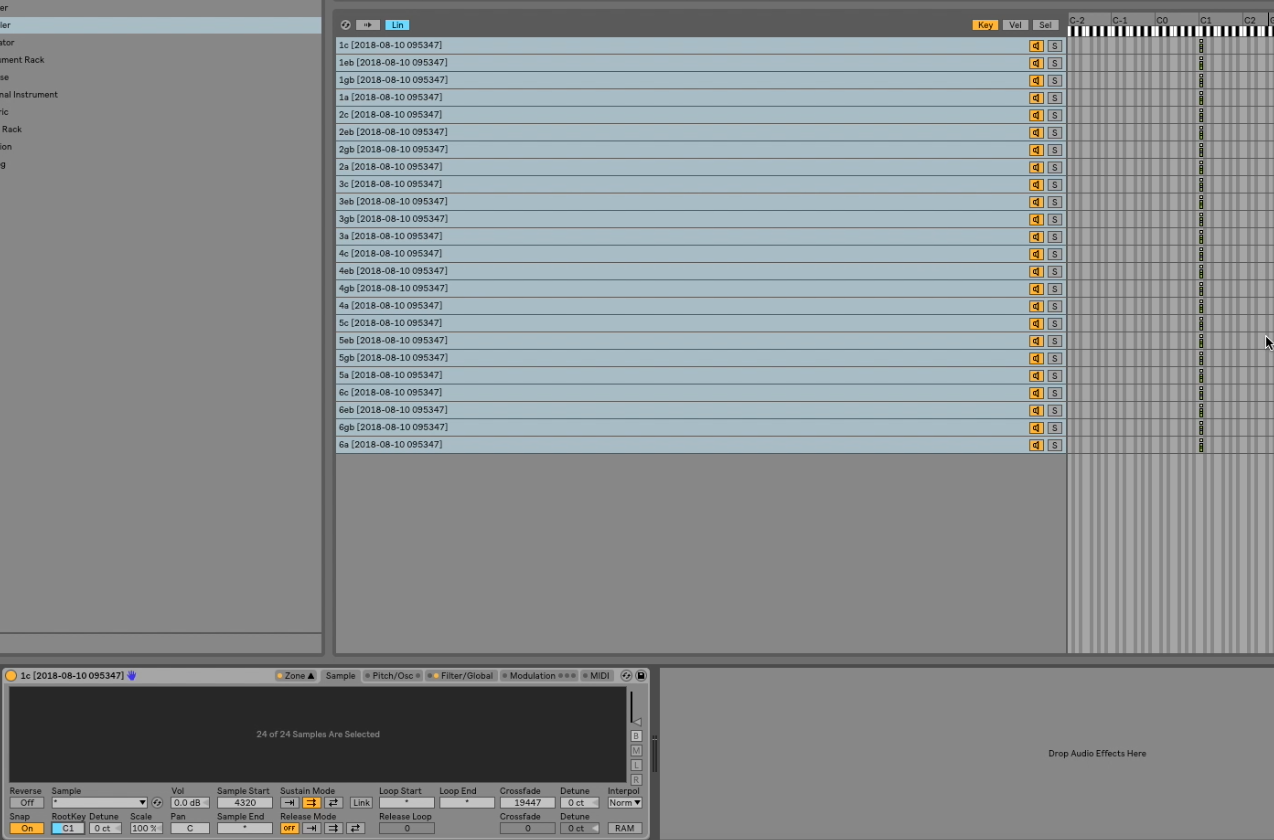
Once your clips have been renamed select them all, right mouse-click and crop them.
Importing To Sampler
Drag an instance of sampler into your live set.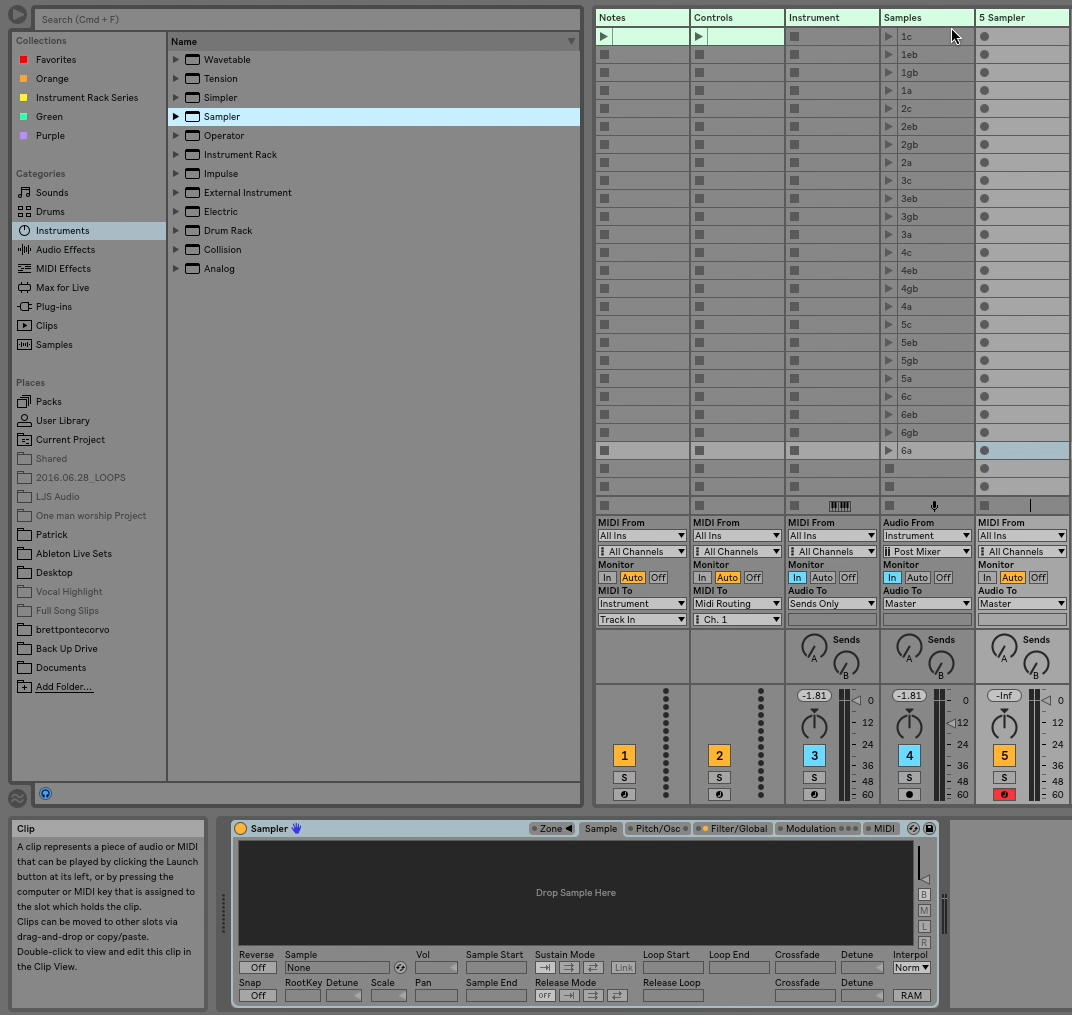
Select all of your clips, and drag them into sampler.
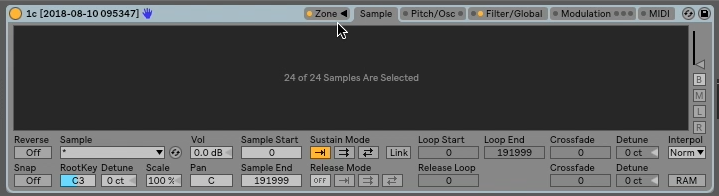
If you click the “Zone” tab, you will notice that your clips stayed in the order that they were in originally created.
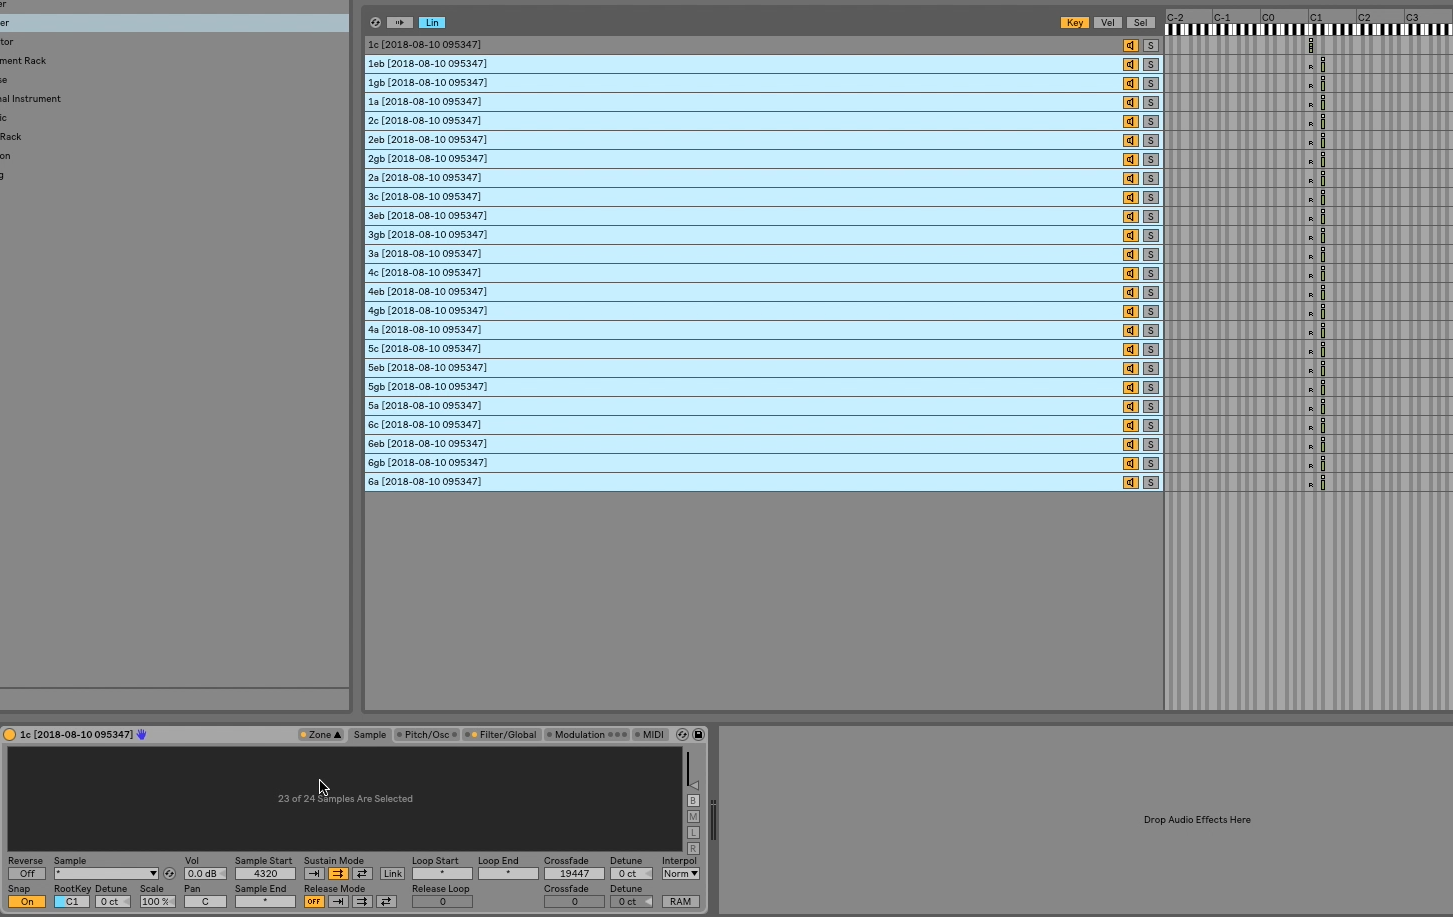
We now need to adjust the settings that deal with how Sampler views the pitch of each individual sample.
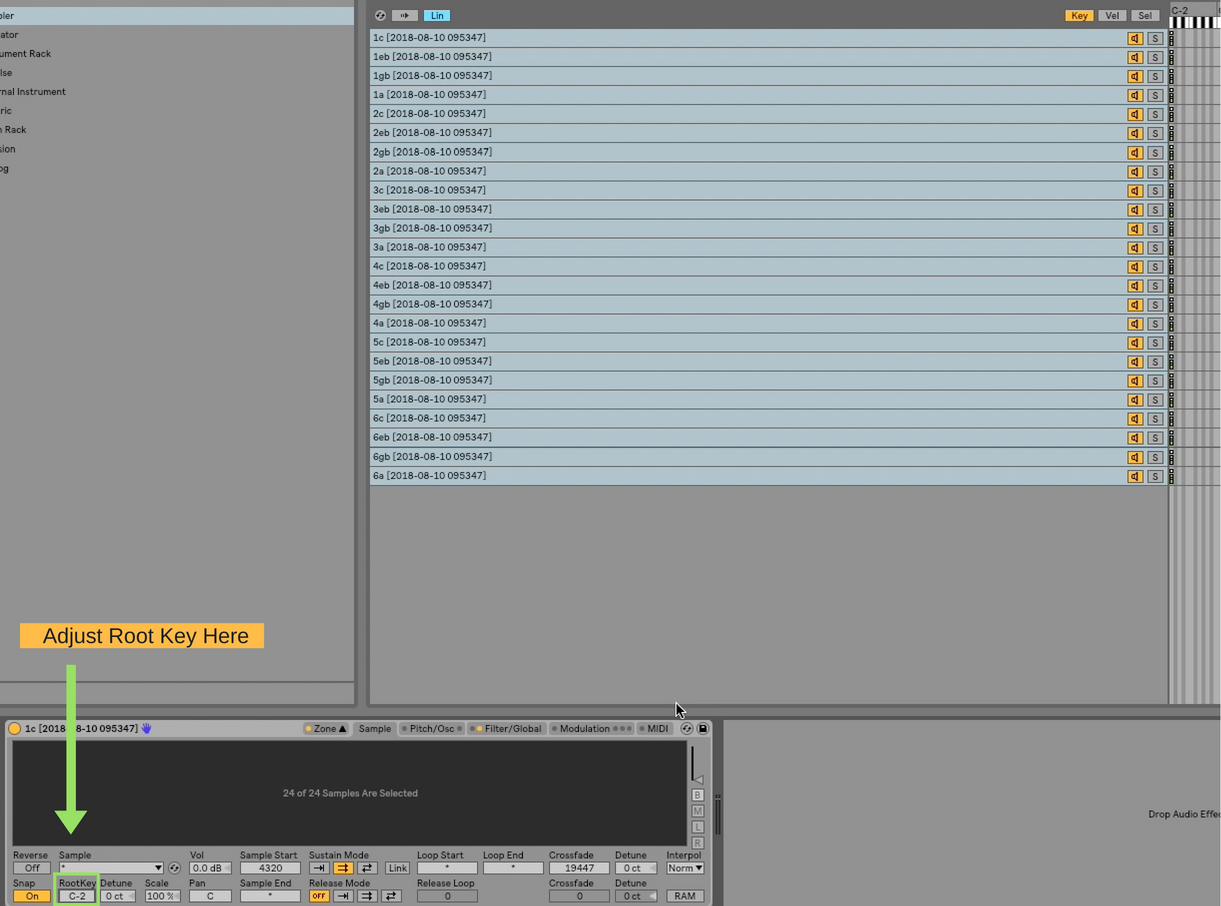
Root And Zone
Select all of your samples, and drag the green zone bars all the way to the left.
In sampler’s interface, move the root key all the way down to C-2
I will do my best with pictures and words to explain the process for moving samples to the correct place on the keyroll, but I do highly reccomend checking out the youtube video, I think in this case, video does a better job detailing how this is done.
In any case, I endeavor for clarity, so let’s proceed.
The most efficient way to move samples to the correct spot if as follows:
Select all of your samples.
Use the right arrow to move the zone until it lines up with C1
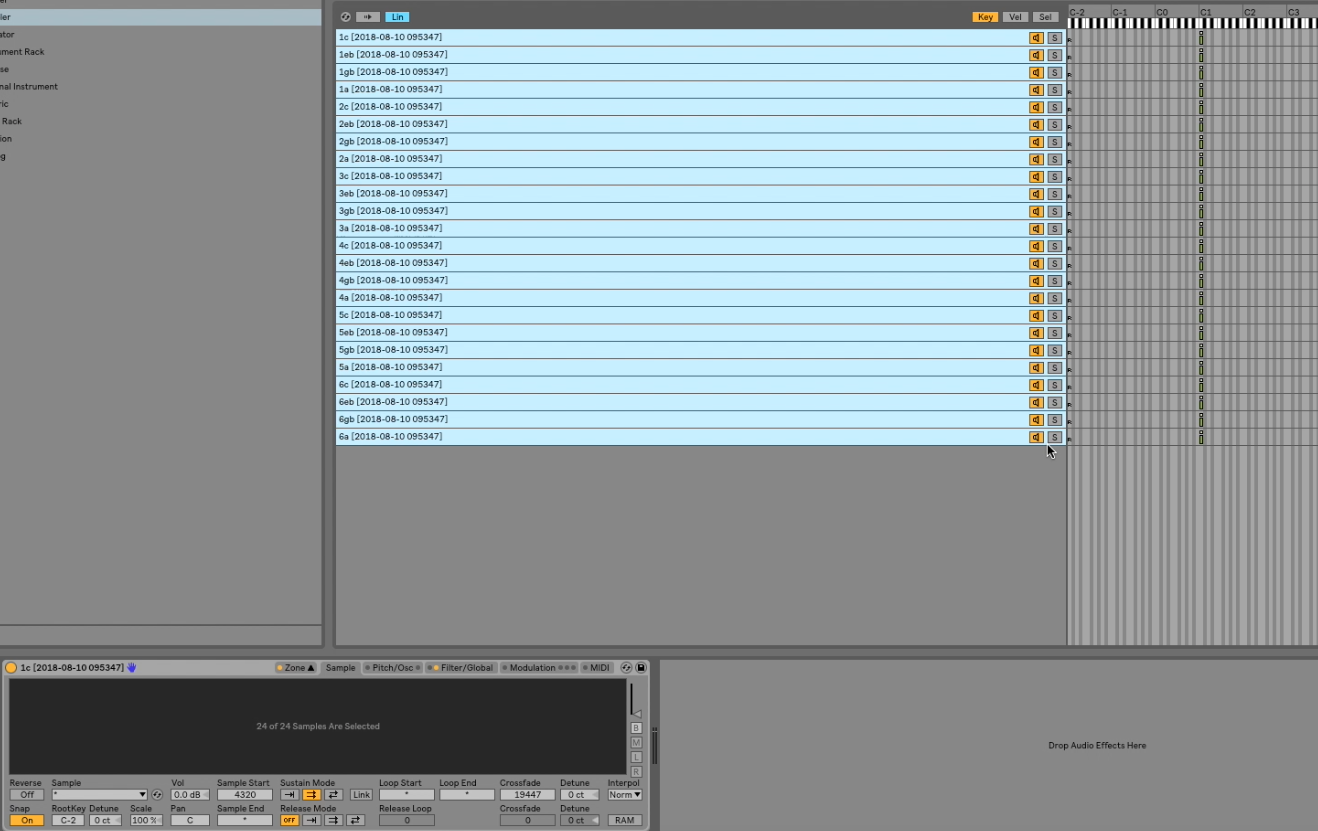
Use the root key, and using the up arrow, change all of the samples root keys to C1
Now select all but the first sample and move your zones to the right three arrows, to Eb1
Using the root key button, use the up arrow to change the root key of all but the first note to Eb1
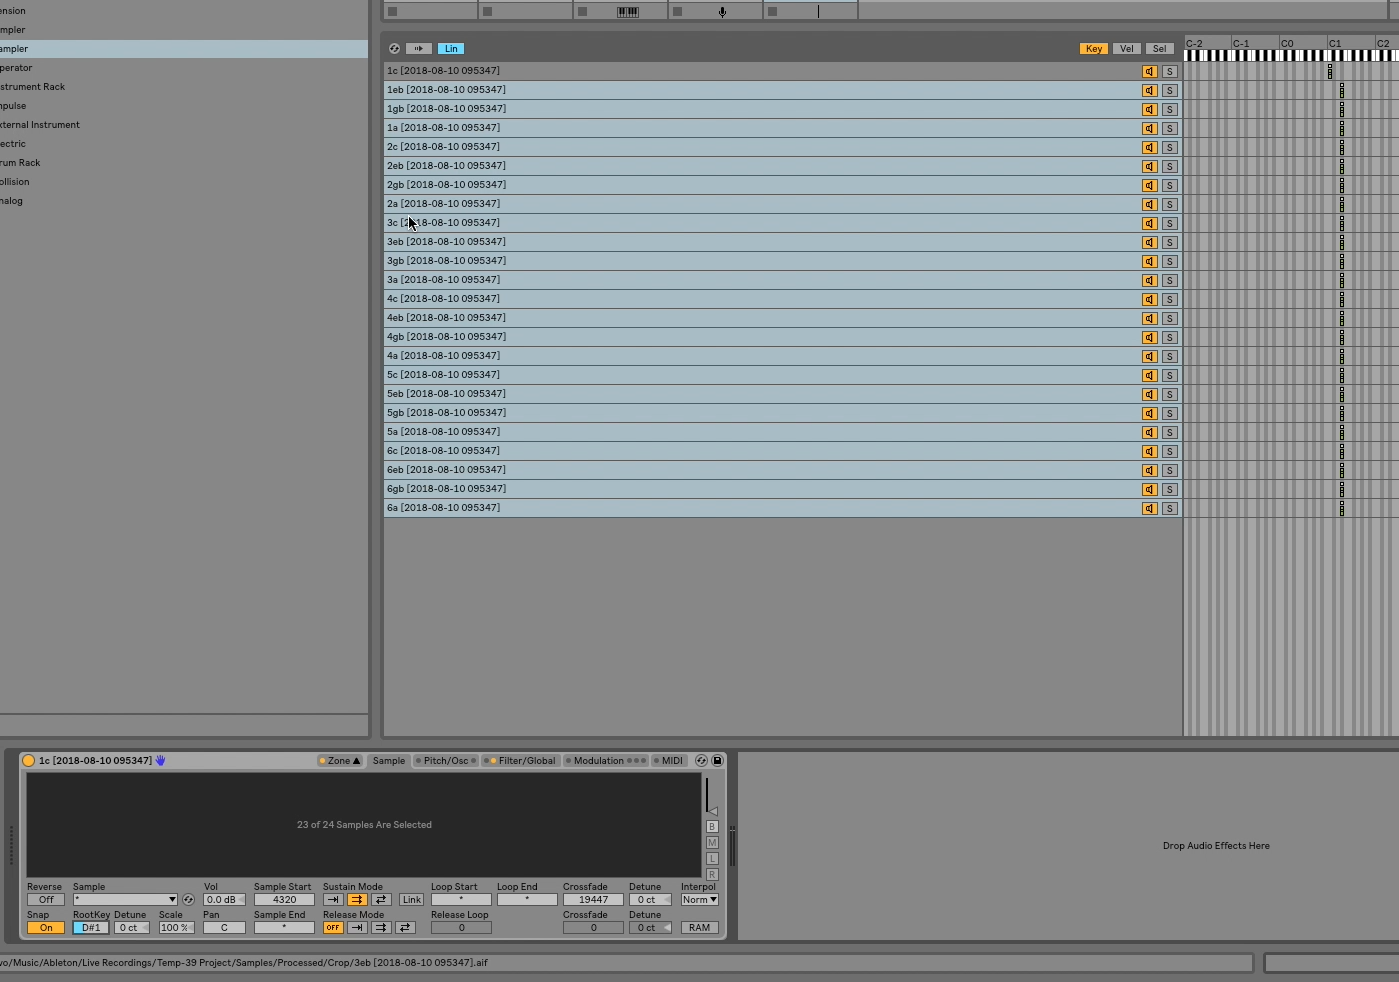
Repeat until you have worked through all your samples
Select all, right mouse click on the zone and choose, “distribute around root keys.”
Adjusting The Start Position
Now, remember way back in the day when we offset the starting midi note so we would catch the attack. The good news is, we caught the attack. The bad news is, we now have to adjust the sample start location. You may notice when you hit a key on your keyboard there is a decent length pause before any signal is produced. This is because there is a short silence on the front end of our audio clips.
So what do we do about that?
We can use the start marker to make sure we get the attack of the original synth while we are playing back a sample.
Step one: Click the first sample, and turn on snap. Now manually move the start marker to the beginning of your sample.

Now turn your attention to the number displayed in Sample Start? Remember that number.
Step 2: Select all your samples, and type that number into the start box.
Now all your samples will start with the correct timing.
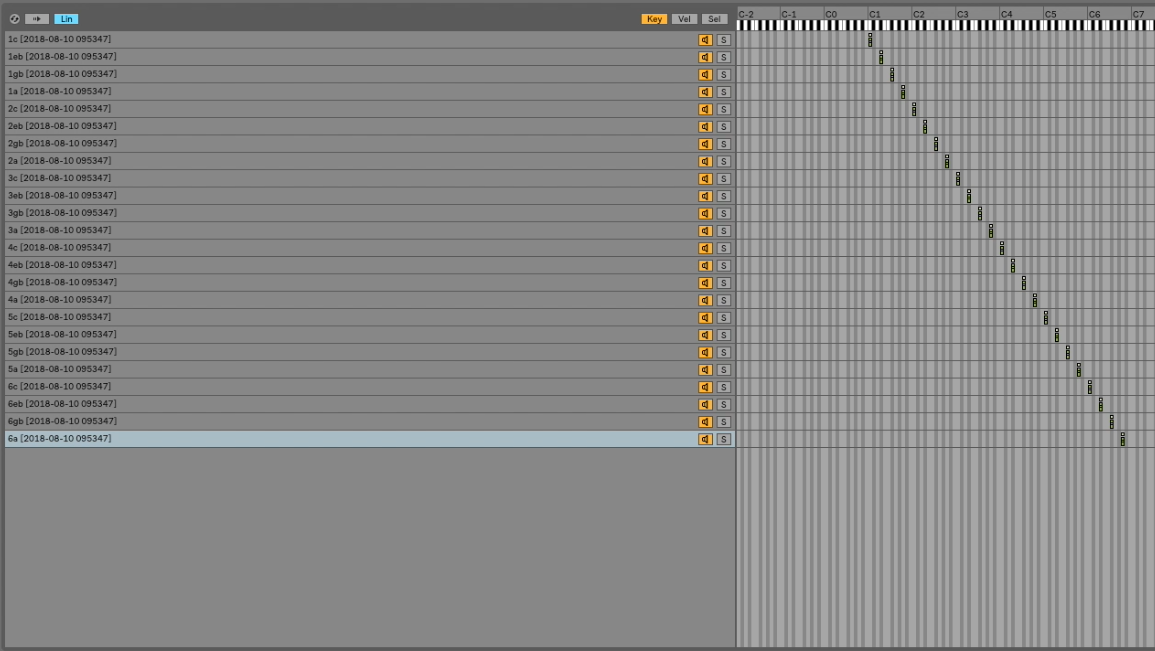
Loop Markers
I like to have a decently long loop, with a good deal of crossfade. The intent of this is that you wouldn’t hear when the sample starts over, to truly emulate the original synth sound.
Step 1: Drag the loop start marker to a little less than midway through the sample.
Step 2: Drag the loop end marker leaving about 25% of the loop left over.
Step 3: Apply enough crossfade that the triangle comes to the beginning of the first full part of single.
Steps one through three will result in the following.
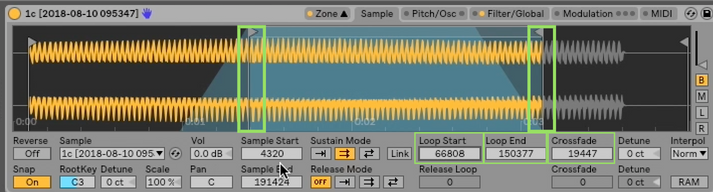
Step 4: Select all the samples and copy the numerical values for loop start, end, and crossfade to apply them across the board.
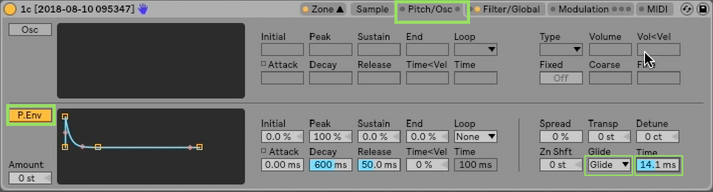
Adding glide
Since the original synth had a bit of glide connecting the sounds, let’s add that back in.
Step one: Navigate to the Pitch/OSC Tab
Step two: Turn “P. Env” on, and then apply a bit of glide until it sounds natural to your touch.
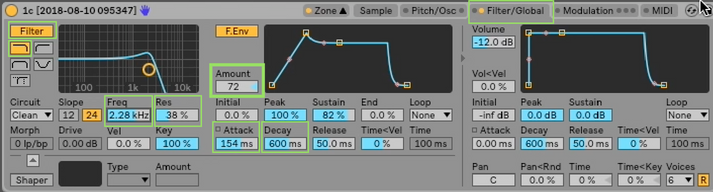
Emphasizing The Attack
For this synth, in want to have the filter quickly open with every note I play. This emphasizes the first note of phrases and adds bite to the sound
Step 1: Navigate to the Filter/Global tab and adjust choose the LPF setting.
Step 2: Set the filter to about 2,000 kHz, and apply a touch about 35% resonance
Step 3: adjust the filter envelope to the following settings.
Celebrate!
You’ve done it.
It takes a lot of words to explain the process, but now that you know how to do it, you’ll be sampling nonstop.
Now, get out there and make something you’re proud of. You’re already well on your way and armed with new tools. Remember, you can always download a copy of my sampler here.
Connect personally with me as well as an entire community to Ableton users on my Facebook group. It’s a great place to give and receive support, and the easiest way to contact me.
I look forward to seeing you there
Until next time, happy creating
-Brett