In today’s post, I am going to show you three ways you can transform Midi into audio in Ableton live.
Method 1: Resampling
In Ableton, you can capture audio from any track you would like, and record it. Making use of that ability, we can record the output of a single track to a new track. Then if it is too our liking, we can delete the original.
Step 1: Create A New Audio Track
This can be done quickly by pressing Command-T
Step 2: Set the Audio from, to receive audio from the track you wish to bounce in place ( Transform Audio to Midi).
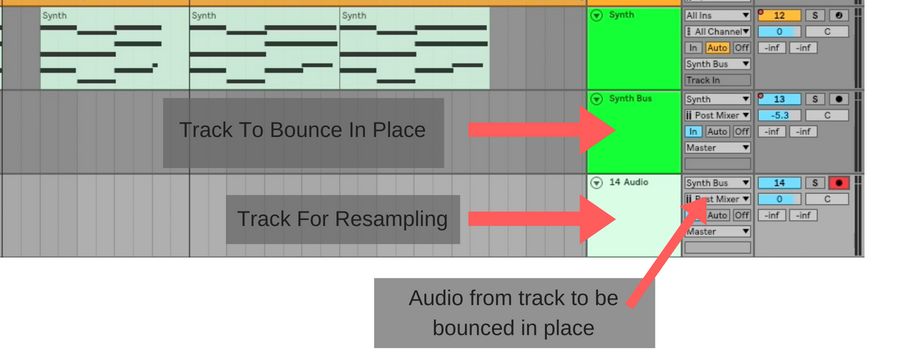
Step 3: Record the audio into your newly created track by record enabling that track, and pressing record.
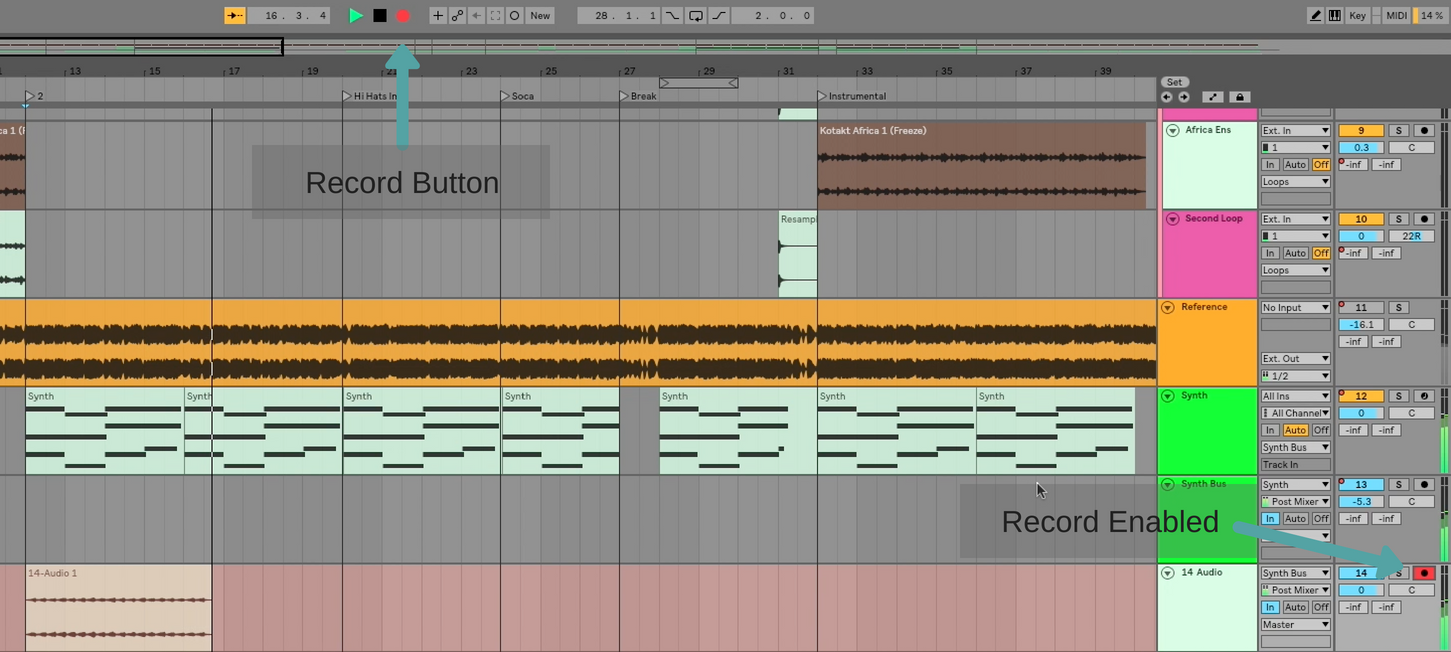
If the audio is to your liking, you can delete the original tracks. Or you can disable them by selecting them and pressing the number key “0” for future editing.
Method 2: Render Selected Tracks
Another way to transform Midi to audio, or to combine multiple tracks into one track, is to make use of Ableton’s export audio feature. It,s export audio dialogue is quite comprehensive and allows you several different options for what it can export.
For our purposes, we will be exporting only a single track, and it will be whatever you select.
Pro Tip: Make sure your Bit Depth is set to 32. This will render an audio file without adding any extra noise
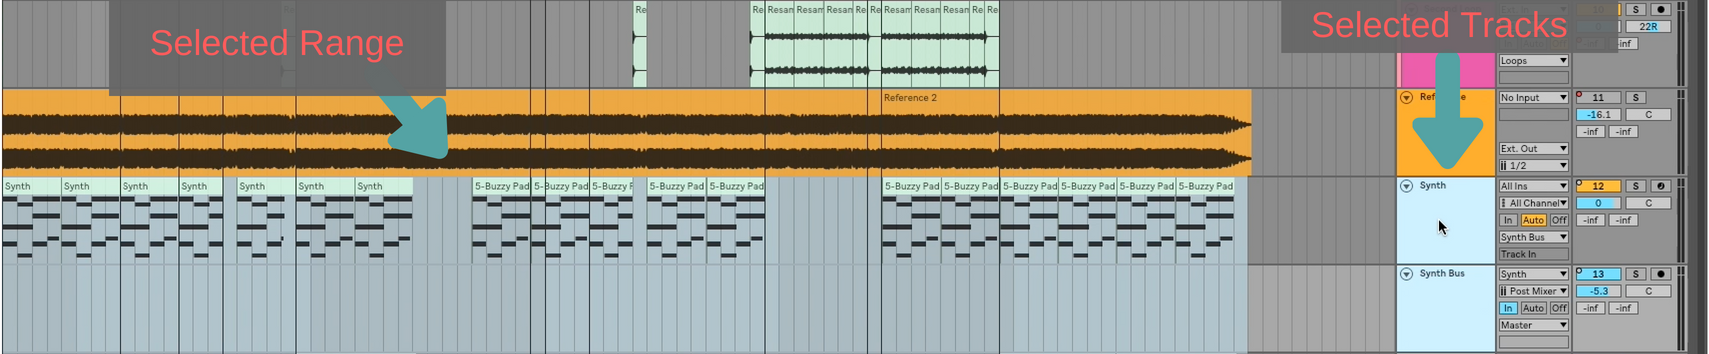
Step One: Select the track you wish to bounce in place by clicking on the track name, then select the range you want to export by clicking on the timeline and dragging. Your results should be as follows.
Step 2: Press Command Shift R to open the Audio Export Dialogue Box.

Step 3: Choose “Selected Tracks Only” from the Rendered Track menu (the very first option at the top).
Step 4. Click Export
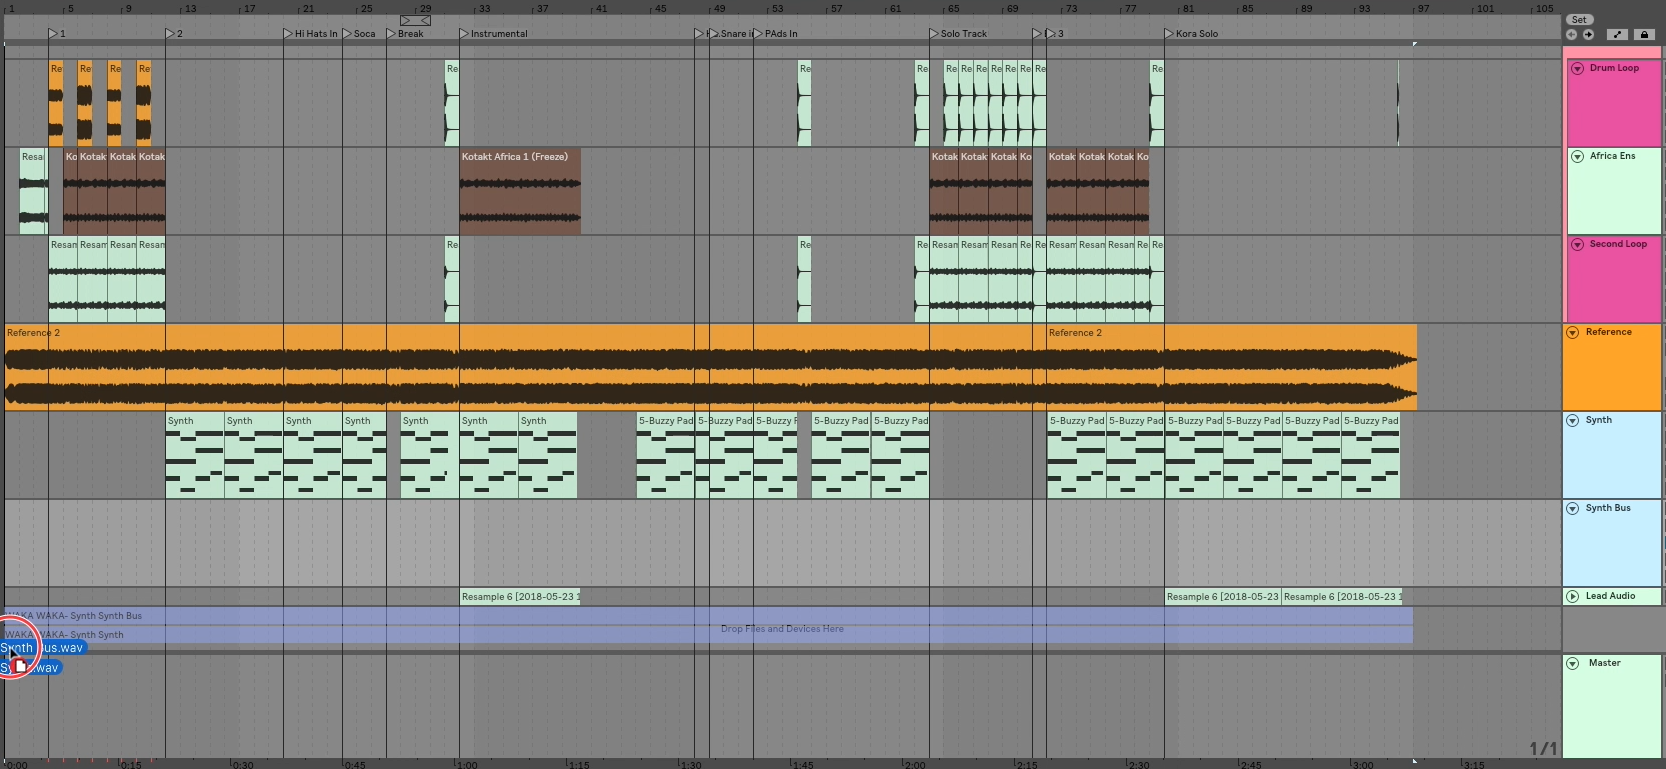
Step 5 drag the newly rendered audio back into Ableton, and line it up where it belongs in your arrangement.
Method 3: Freeze and Flatten
Freeze and flatten feels the least labor-intensive of the three options. There is one major downside however: You cannot flatten a track that has a sidechained effect on it. So if you are rocking some sick sidechained kick drum or anything of the like, this method is not going to work.
If your track is not side chained to anything, this is a totally viable and relatively quick method of bouncing in place.
Step one: Right mouse click on the track of your choice and choose “Freeze Track” from the dialogue.

Step two: After your track has finished freezing. Right mouse click a second time, and choose, ” Flatten”

Once it has finished flattening you will be left only with your new audio!
I’d love to connect with you personally! So come join my facebook group and connect directly with me and a whole community of Ableton learners who can help you on your journey. In addition, you can book a private lesson with me using this link!
I can also be reached at my contact page here.