How many times have you made a drum part that is just a little bit too busy for verse 1? How many times have you copied a piano part to a string section and wanted to mute the piano notes, without muting the whole track?
It’s hard for me to count.
This is why it can be so helpful to deactivate clips and notes.
Your Fancy Drum Part
Now, you’ve spent roughly the last 48 hours working on a 4 bar drum loop. You are trying to keep it tame and tasteful, so you’ve only used a kick, snare, 4 toms, vocal shouting FX, guitar slices, crash cymbal, Chinese cymbal, guiro, and shaker, maraca, bell tree, hi-hat, tambourine, and rain stick.
You can tell you’ve finally arrived at musical perfection. You wipe the sweat off your brow, take a swig of water, and play it behind the first verse of your song. To your surprise and chagrin, it sounds shockingly too busy.
Panic begins to ensue, because although you know its stylistically incorrect, you have aged two days trying to make this part, and you don’t want to let it go.
And you’re not entirely wrong in feeling that way either. What if later in the arrangement it would really work, and its just a little jarring to start with?
This is where deactivating notes come in.
Deactivate: Notes, But Muted
You could have just deleted notes part by part. But instead, you’ve found the better way.
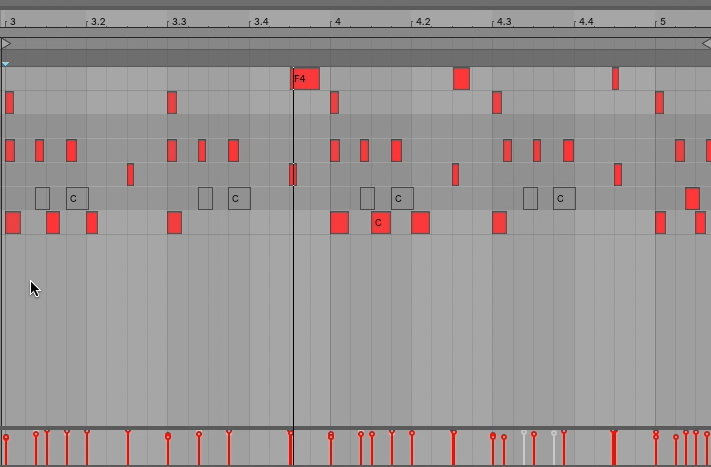
Selecting a note and pressing the number, “0” will deactivate that note. What this means is, the note will still be in your clip if you decide to add it back later, but will not play right now.
THIS IS BRILLIANT.
That means you wasted none of your time making that awesome drum track because you can slowly add elements back in as the arrangement calls for it simply by reselecting and pressing, “0” again.
Deactivate Clips
Deactivating a clip works in exactly the same way, but instead of selecting a note, you select a clip on the timeline. The same will work in session view.
I find that I use this most commonly when I want to audition parts I’ve created on my piano track with other sounds.
To do this I duplicate the midi clip to the midi track containing the sound I want to hear. Then I deactivate the clip on the piano track and have a listen to just my new sound.

Now the plus of duplicating and deactivating is that I can make slight adjustments to the midi notes on the new sound, without losing the original work I created in the piano track. Then if I decide I don’t like it I can simply reactivate the piano clip, and delete the copy I made.
It’s the workflow tips like this that keep me excited about creating. It’s not just the making that gets me excited, its the learning how to use program features to make the creating even more streamlined.
Brilliant.
Now get out there and make something you feel proud of! Every time you do, you get better at your craft, and you get to make something cool. And just a friendly reminder to be gentle with yourself. Strive for excellent without belittling the imperfect.
You’re doing great.
Connect with me directly by joining my facebook group. It’s the best way to get in touch with me, and a whole community of Ableton users. It’s a great place to give and receive support.
As always,
Until next time, happy creating.
-Brett