When switching to Ableton, especially from Mainstage or Logic, I’ve seen people really struggle with locating the tools they need to accomplish simple tasks.
Of course, these are three different programs, all with different strengths. Ableton on a purely geographic level is not set up quite the same way Logic and Mainstage are, and that is exactly what we are going to tackle today.
Make sure you grab a copy of the “Fast Track Patch List Guide” as well so that you can start making great live sets in Ableton even faster.
WHERE IS EVERYTHING!?!
Years ago with my first serious music project, we recorded an album in logic and started performing live using mainstage. The trouble was, with the number of sounds we were using, and the full backing tracks for each song, every show we played, Mainstage crashed.
Since we were a two-man project that left our sound very naked. So we set out on the long journey towards rebuilding everything in Ableton.
It was quite a project.
This post covers some of the things I wish i could have immediately located when I started making the switch
For a more in-depth look at making the switch, be sure to check out The Complete Transition Course, which will give you every single tool you need to flawlessly change from Mainstage to Ableton, as well as 15 great sounds, and over three hours of detailed video instruction on how to maximize Ableton for your live performance needs.
5 Things I Wish I Could Have Found
Locating the Essentials
Sounds, Audio Effects and where to put them.
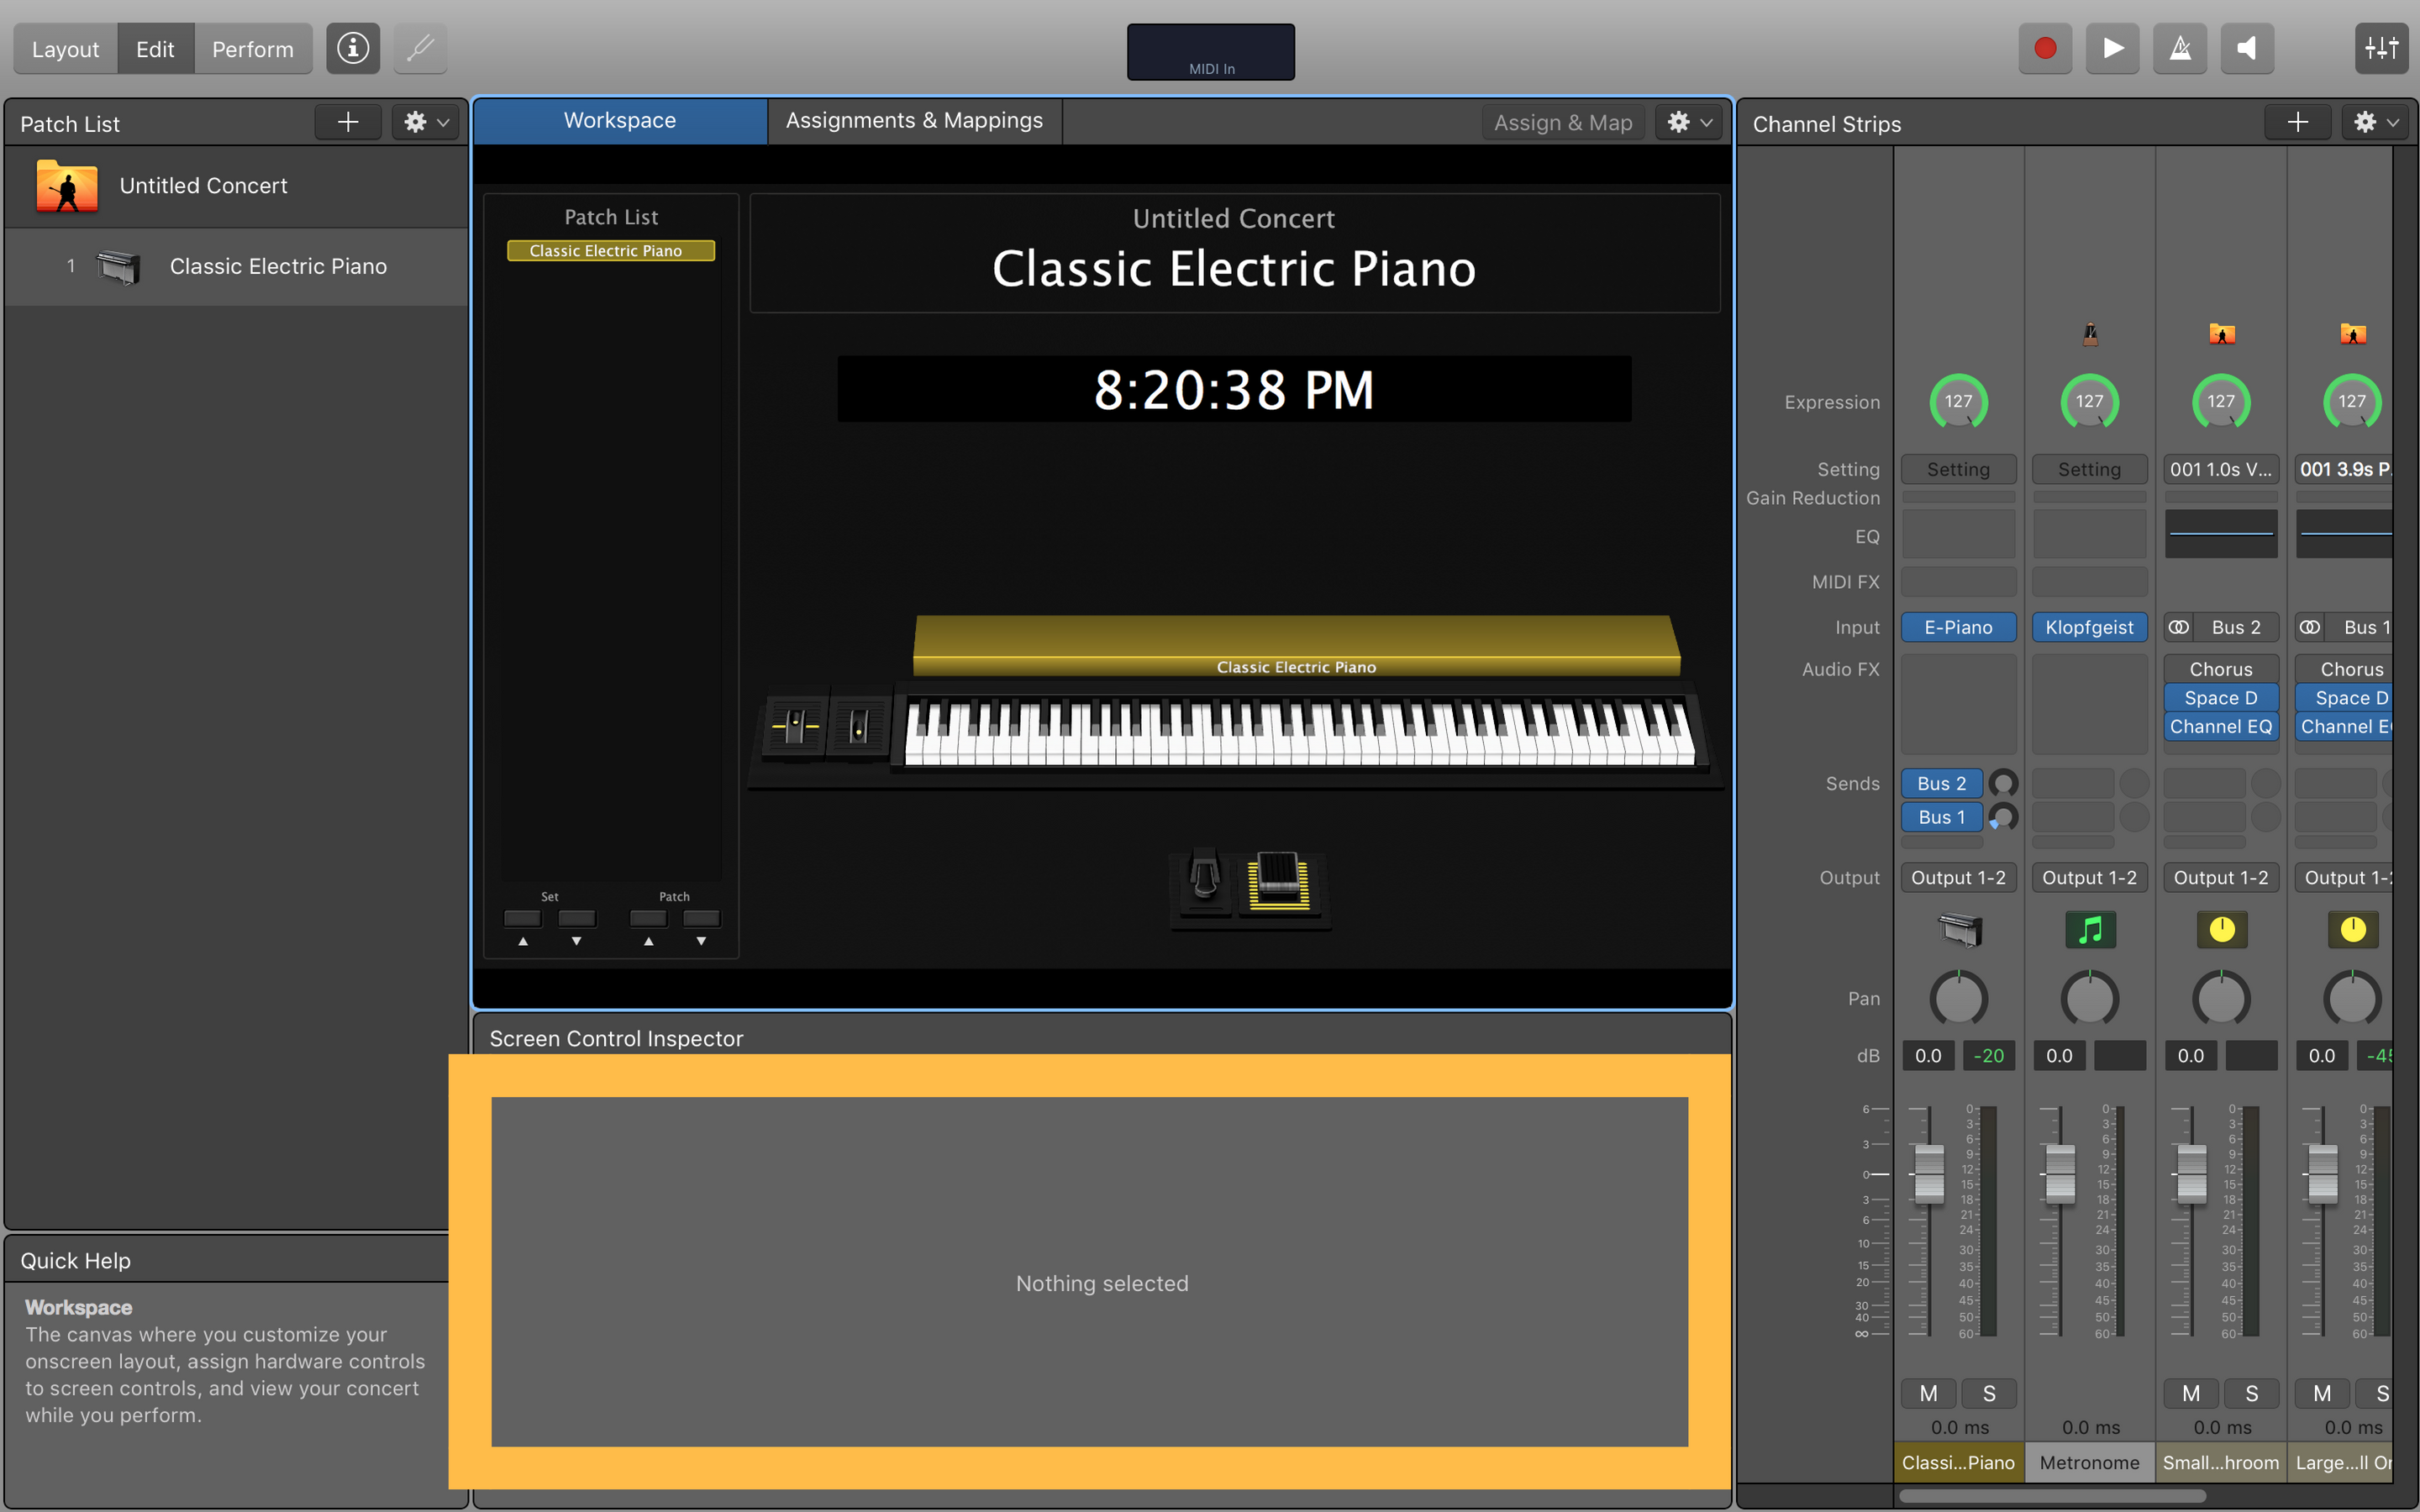
This section of Mainstage’s user interfaces changes depending on what you have selected. Common tasks accomplished from this part of the screen are
- Choosing sounds
- Changing ranges of instruments
- Choosing midi inputs
- Setting Patch Tempo
That’s a whole lot of stuff for one menu. But no fear. Let’s locate these in Ableton now:
1: Choosing Sounds
Using the browser
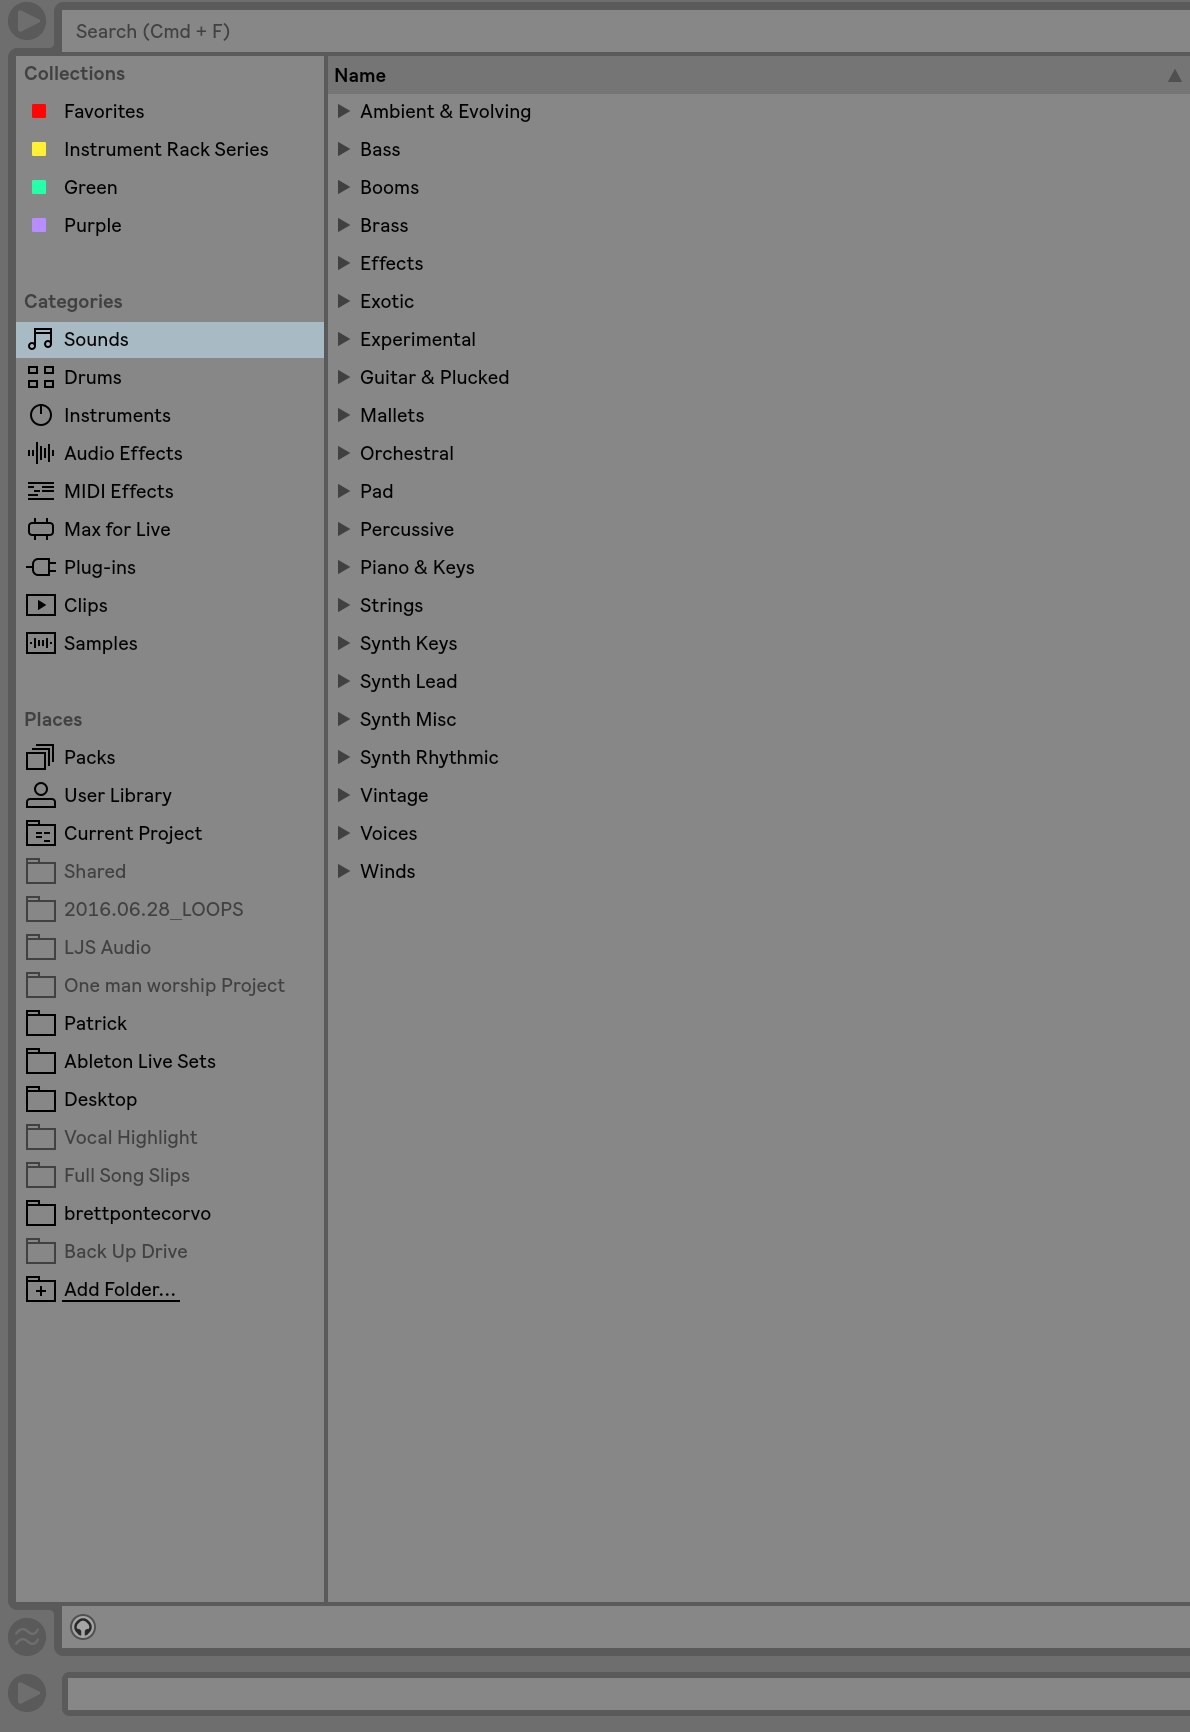
Much of what you will need in terms of adding devices of any kind to your set will come out of the browser. But in this case, since we are specifically talking about finding sounds, you will need to look under the instruments or sounds categories. Once you find something you like, you can drag it over onto any one of the Midi channels to start playing it.
It may look a little like this:
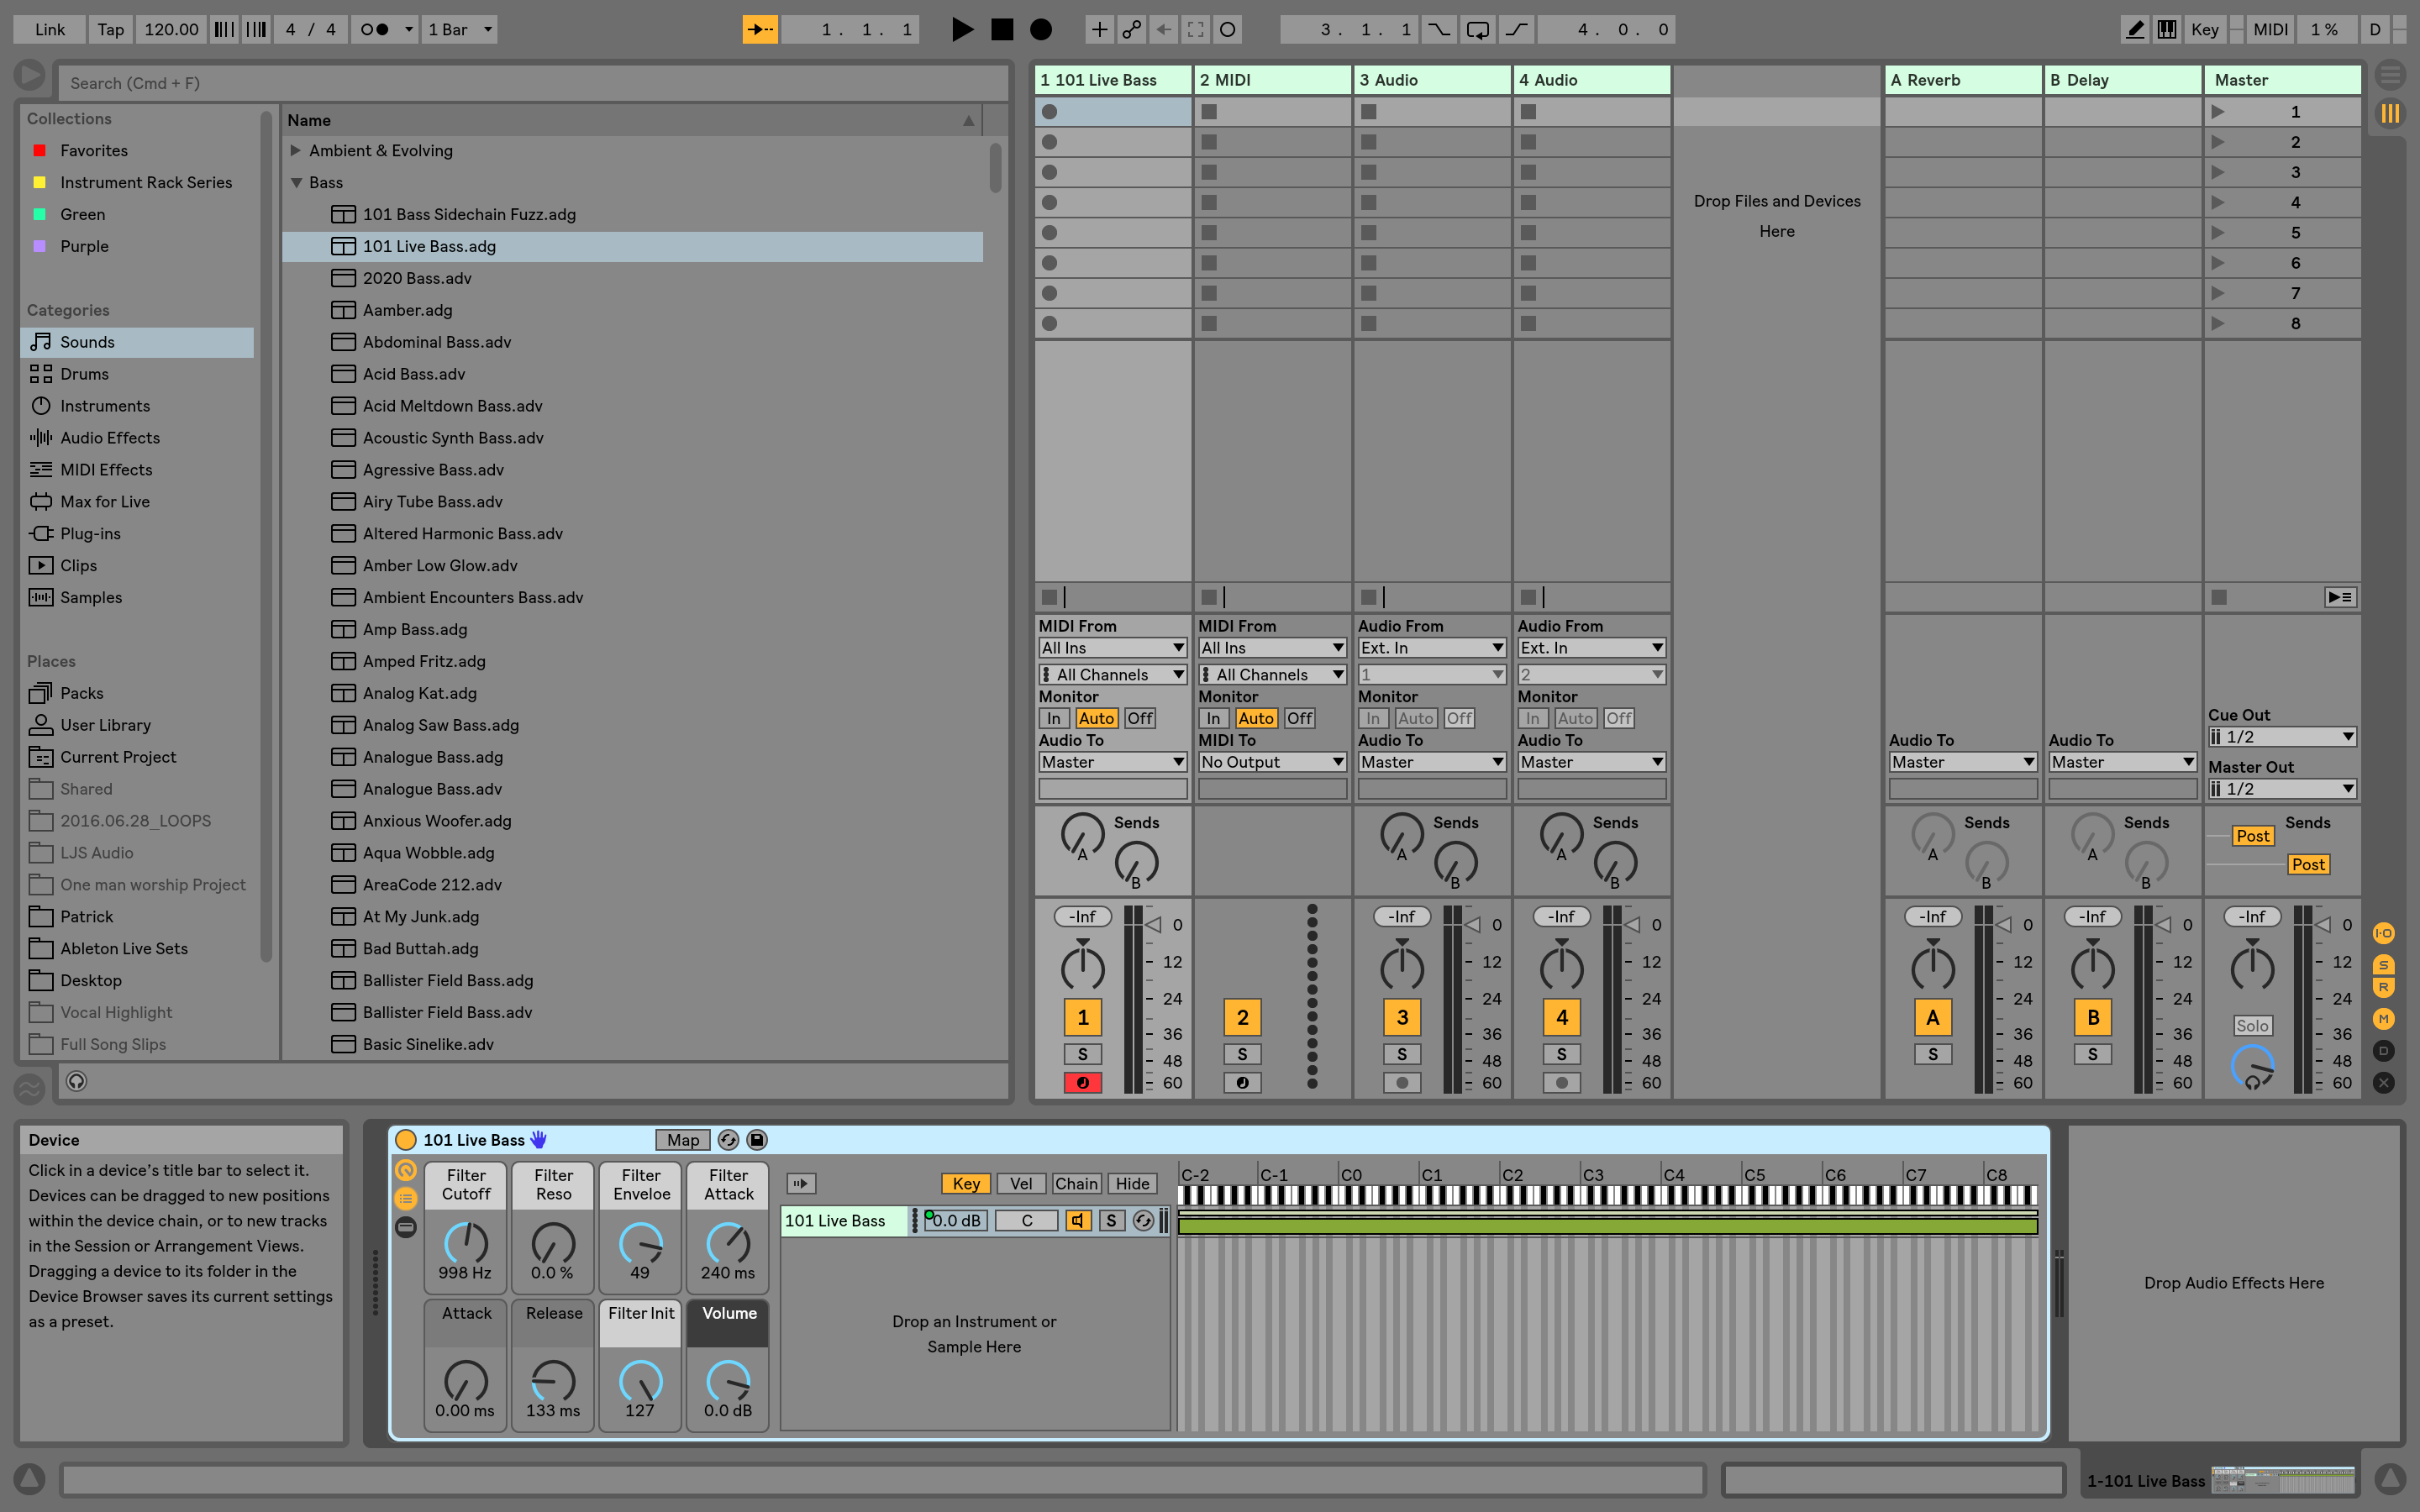
You’ll notice the bottom of the screen changed a bit. That portion of the screen changes just like in Mainstage, but only serves two purposes
- To edit your software instruments or Audio Effects. (Device view)
- To edit midi or automation (Clip View)
If you need some great piano patches, you can check out the Pro Piano FX Collection here
2. Changing The Range of Instruments
Instrument racks
I could sing the praises of the power of instrument racks all day. This is the easiest way to set the range of a midi instrument. I’ve gone in depth about how to do that on my post about creating a keyboard split.
Here is a screen shot zoomed in on the above software instrument I added.

As long as you have both menus I’ve pointed to above selected, (You’ll know they are selected because they will be yellow) You will be above to adjust the range of your instrument by adjusting the green bar to the right.
If you need to automate the range of your instruments, you can check out this post as well.
3. Choosing Midi Inputs
Here I have zoomed in on the midi channel strip I added my sound to.
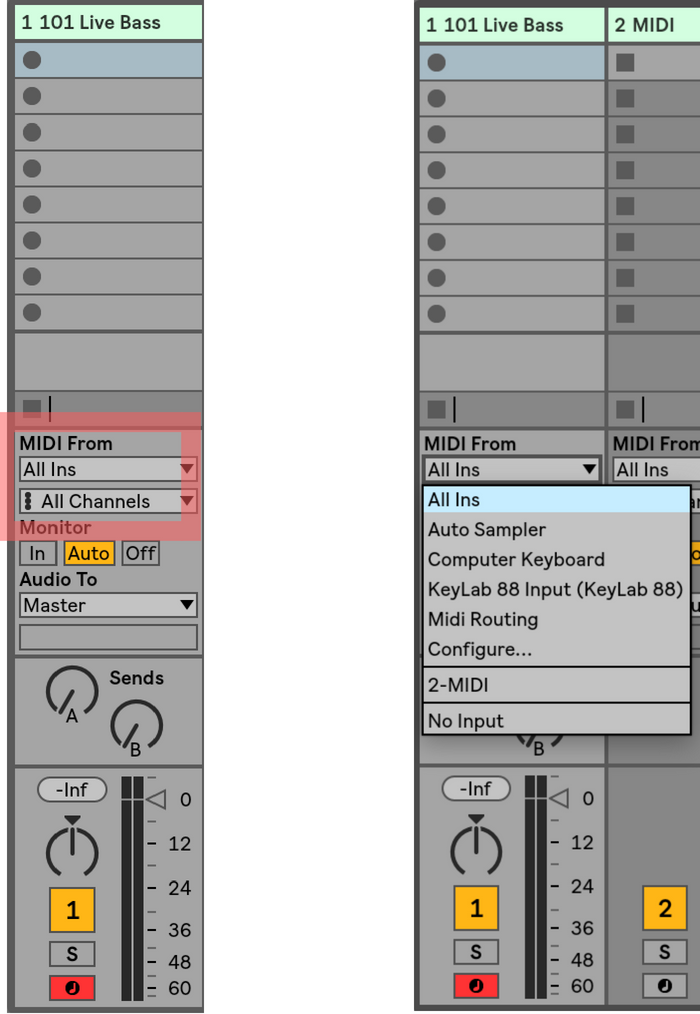
From the “MIDI from” drop-down menu, you can select which input will play that track. Pretty straightforward, but also easy to miss.
This is particularly useful if you have more than one hardware instrument, and you want to use each one for different sounds
4. Setting Patch Tempo
I love the way Ableton handles tempo information.
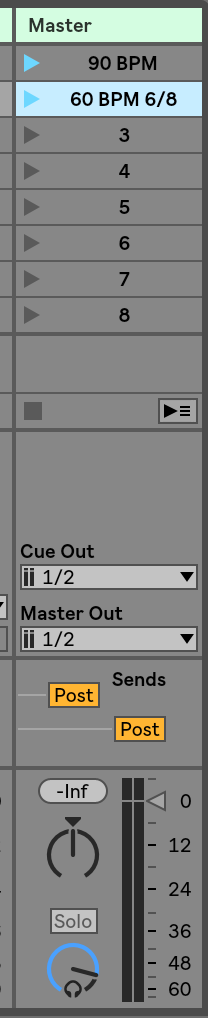
To the right of Ableton’s UI, you will see the master channel. By default, these will be numbered 1-8. But we can use these “scenes” (the horizontal grid in session view) to change tempo and time signature very quickly. Rename any scene to your desired tempo followed by the letters “BPM”, (standing for beats per minute) and/or a time signature. When that scene is “fired” (The play button for that scene is clicked) the tempo and time signature will change
You can double check that in the top left-hand corner of the screen where the tempo is displayed
This is particularly powerful when used in conjunction with patch changes. This way, as you roll through your sounds, time-sensitive effects and playback tracks will play in the right tempo and time signature with you as you scroll through your set.
You can also adjust the tempo of your set using two buttons on any controller.
5. Midi Mapping
MIDI mapping in Ableton and Mainstage are different. Mainstage allows you to have patch by patch mappings that change as you scroll through your patch list. Ableton does not have this functionality.
Ableton has two features that make up for this in my opinion.
- You can assign a mapping to your computer keyboard, which can be a lovely feature to have, especially if you are starting out without a lot of gear.
- Macro knobs located on instrument, midi effects, and audio effects racks can be mapped to any parameters within a single channel strip. Making use of these allows you to have excellent control of your software instruments and audio effects. You can check out how to use them in this post about my favorite things to map Macro controls to.
If you need a great controller to map some parameters too, I highly recommend the Novation Launch Control XL.
I go into details about how I use this controller in my post about creating smooth patch changes.
How to Map in Ableton
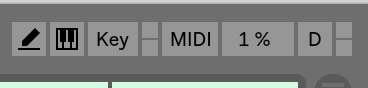
1. Click “MIDI” in the top right-hand corner of your screen.
2. Select the parameter you want to control
3. Press the button you want to use to control it on your midi device
4. Click MIDI again to exit.
I know this will help you get started out on the right foot, and hopefully answer some of the basic questions you might have had when looking at Ableton’s UI.
Have more questions?
I want to hear from YOU. Contact me here, or on twitter @MStoableton.