Using the IAC driver is a great way to store “presets” if you will. For example, perhaps you have a piano sound you really like, but for one song you want it super dry, and for another you want it to have an 8th note delay and some reverb. You could create two dummy clips, one that sets the piano to the driest setting, and another that sets it to the delay/reverb setting.
The possibilities don’t stop here. As a matter of fact, you can use the IAC driver to control programs outside of Ableton Live. Sometimes you may want to send midi to a stand-alone synth that lives outside Ableton live. Or perhaps you are using the IAC to control pro presenter while you are playing.
The number one benefit of using a dummy clip sending info to your IAC driver over just mapping to a dummy clip on a parameters specific channel strip itself is that you can have ALL the parameters for a particular setting in ONE clip. This is helpful for keeping a clean workable set.
Setting up the IAC driver in Mac OS
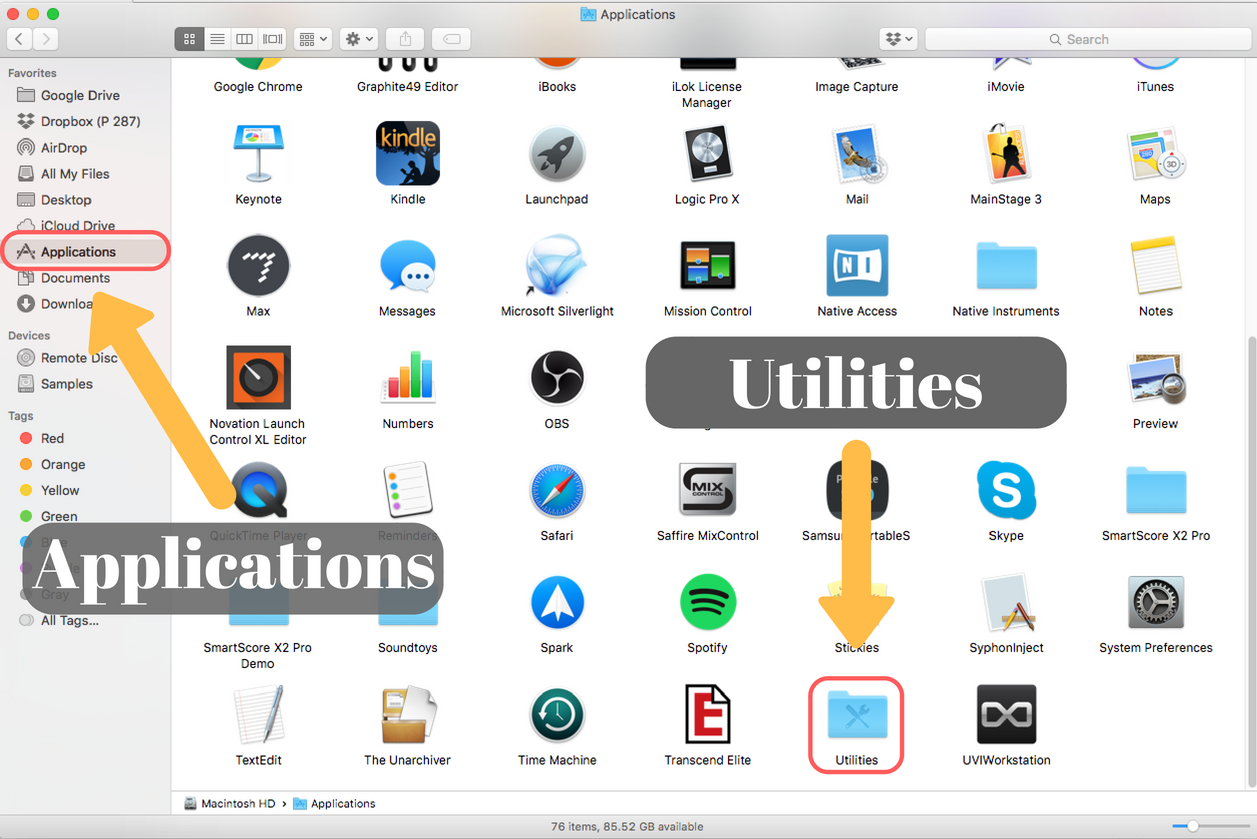
Step 1: Open Audio/ Midi Set up
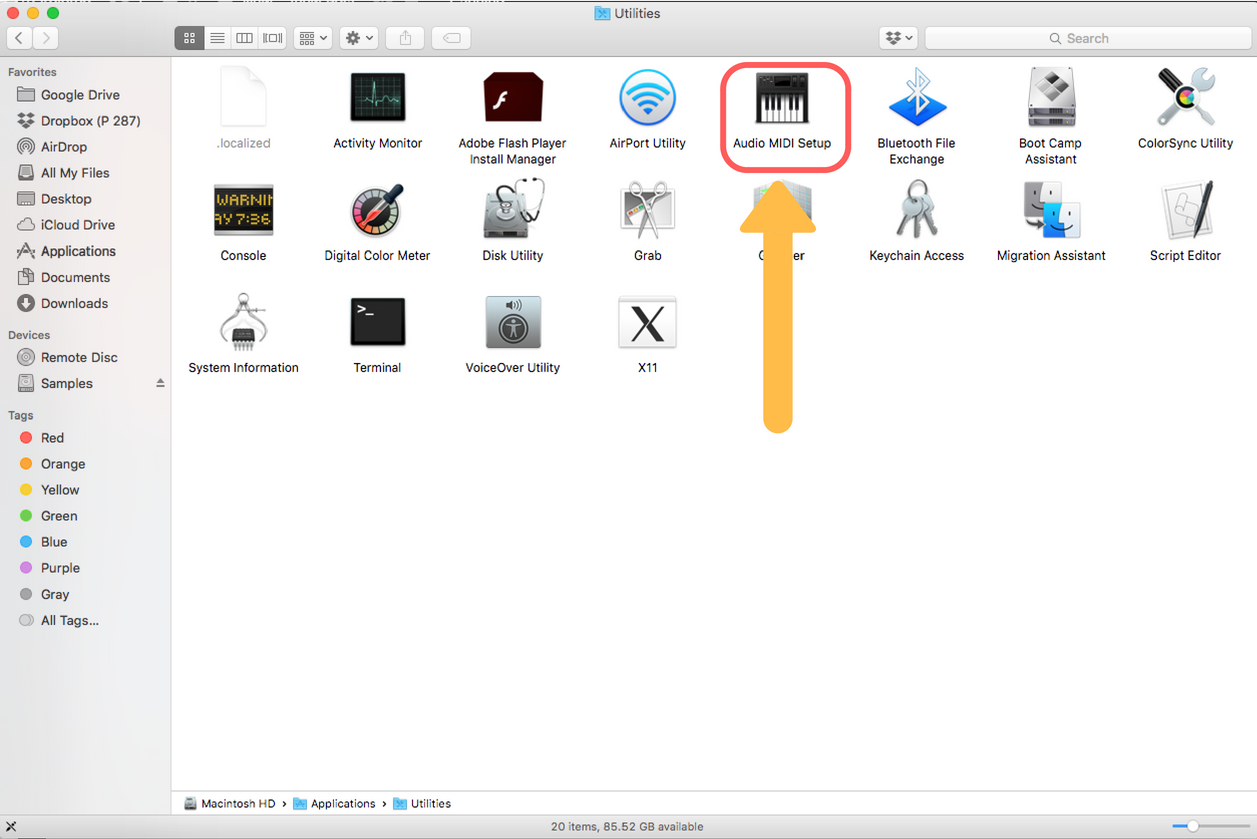
Navigate to finder and choose: Applications –> Utilities –> Audio/Midi Set Up
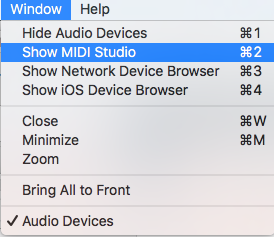
Step 2: Show Midi studio by navigating to the window menu and clicking, “Show Midi Studio”
You can also press command – 2 to pull the window up quickly
Step 3: From the Midi studio, Select the IAC driver.
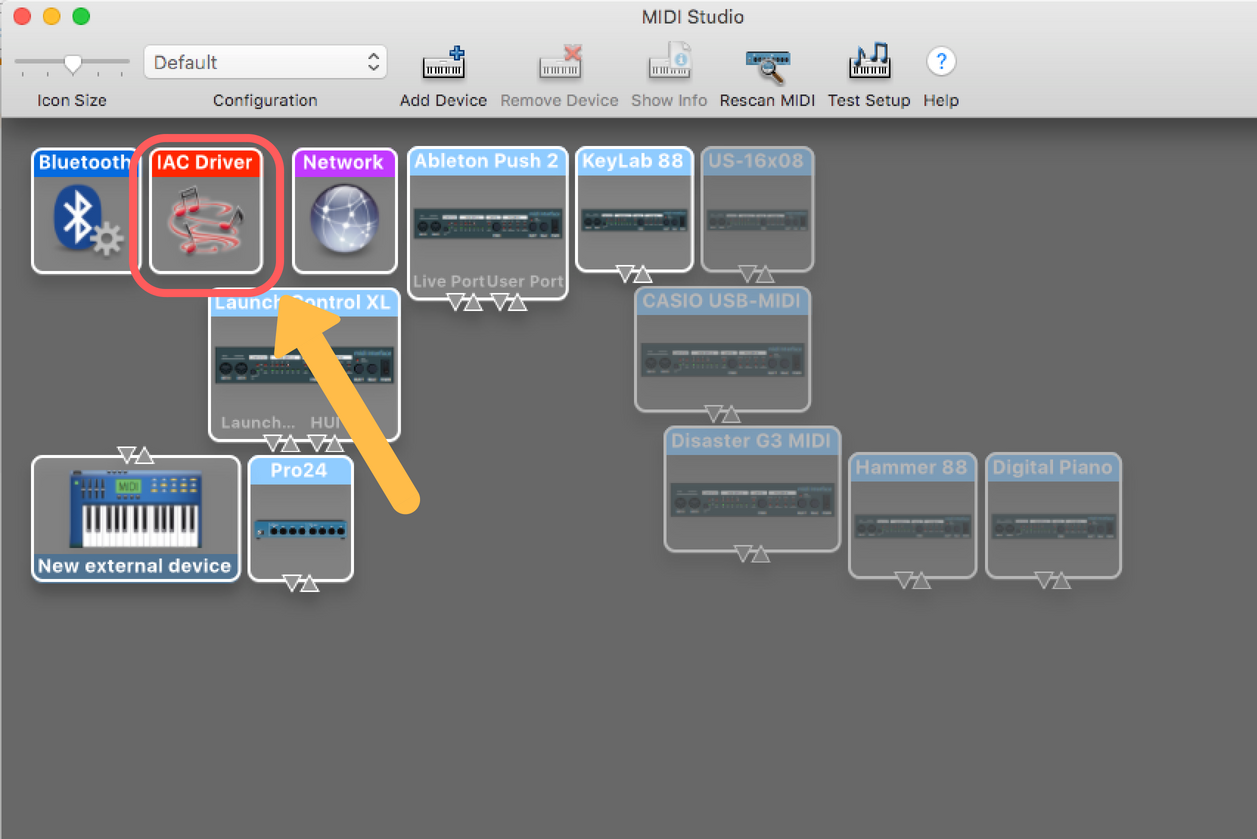
Step 4: Make sure the “Device is online” box is checked.

Setting up Midi Preferences in Ableton Live
Now we are going to walk through how to set up your Midi ports inside Ableton so you get all the functionality you need from the IAC driver. For a more detailed explanation of midi ports, check out my other post, Ableton Midi Preferences: Simplified.
Step 1: Open Midi preferences by pressing Command – ,
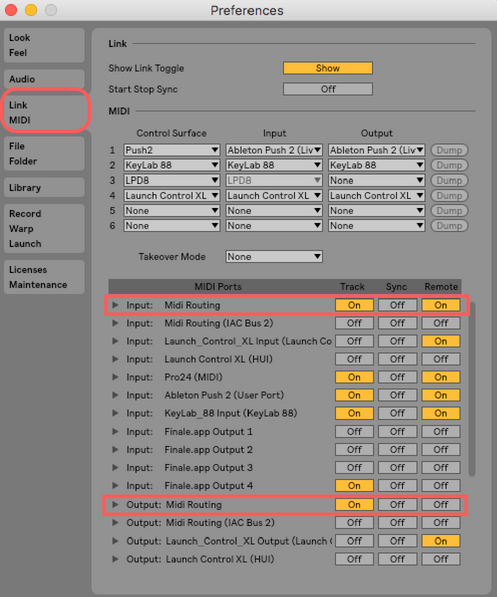
Step 2: From the “Link MIDI” tab, set the IAC driver (below named Midi Routing) input to have track and remote on, and the output to only have track on.
Mapping from the IAC driver in Ableton
Like I said previously, using the IAC driver you really can map to anything that is mappable in Ableton Live, but for this example, I am going to demonstrate how to map turning a plugin on. Once you can create a mapping, you can go off to the races with any type of custom mapping you want.
Step 1: Create a midi channel strip that receives midi from “no input” and sends midi to “IAC Bus”
These options are available from the drop-down menu’s near MIDI from, and MIDI to.

Step 2: Create a blank midi clip by double-clicking in an empty midi slot.
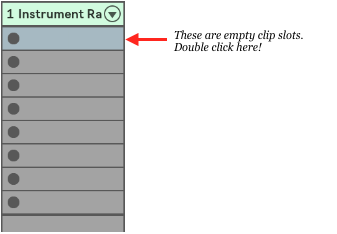
Once you double-click, a clip will automatically be created for you.
Step 3: In the clip view, choose any MIDI cc you would like, and create an envelope that goes from 0-127. For this example, I am using CC 31.
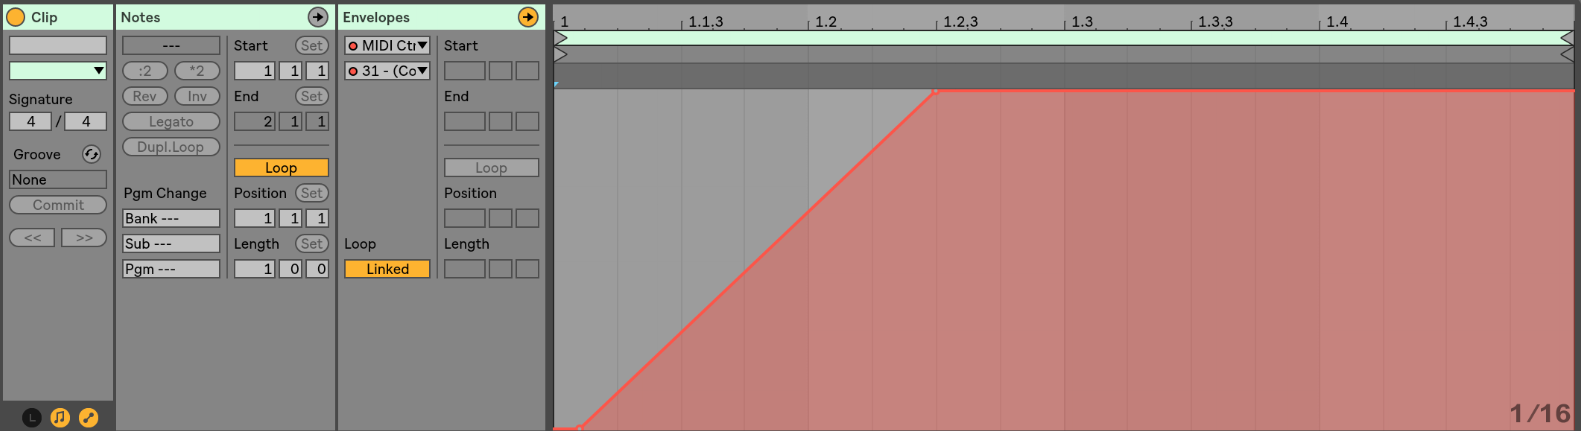
Step 4: Fire the clip!
Step 5: With the clip still playing, select the parameter you wish to map. In my case, I will be turning my filter on. So I will click the on/off button on my auto filter.
Step 6: Hit Command-M. You will see the mapping appear almost immediately.
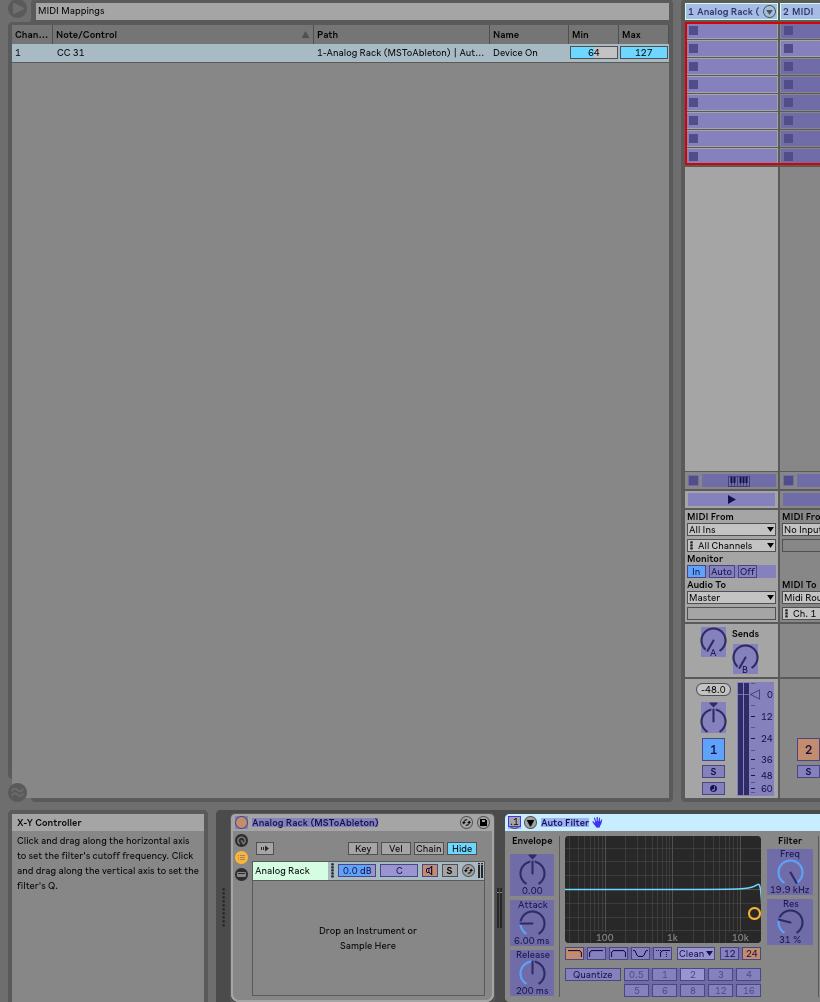
Step 7: Exit out of midi mapping mode by again pressing Command – M.
You will now see that the Auto Filter is turning on and off as long as your clip is playing. You can now turn the loop off on your dummy clip so that it doesn’t keep toggling on and off
One more note…
You can use the same Midi CC to turn a device on and off. To make it turn on, create an envelope that goes from 0-127. To make a device turn off, create a clip that goes from 127-0.
Also, remember to be intentional with if clips loop or not. A looping on/off clip (When that’s not what you were intending) can be quite distracting.
Experiment
Now you’re all set up. There is much more you can do with IAC mappings just like this. Mapping an envelope to the frequency of a filter is always a nice touch, or creating a few preset sounds that can all be triggered through firing dummy clips.
As always, feel free to reach out to me via our contact page, or our Facebook group. I’d love to hear from you and am happy to answer any questions you may have.