I love a good preset sound. I even love a halfway decent sound. Presets are a great starting point to make something awesome.
Thankfully, Ableton is full of great presets. Recently, I’ve been really enjoying checking out all of the awesome wavetable presets. Today we are checking out the wavetable preset, “Lush Roads”.
What I Love About It

The Attack
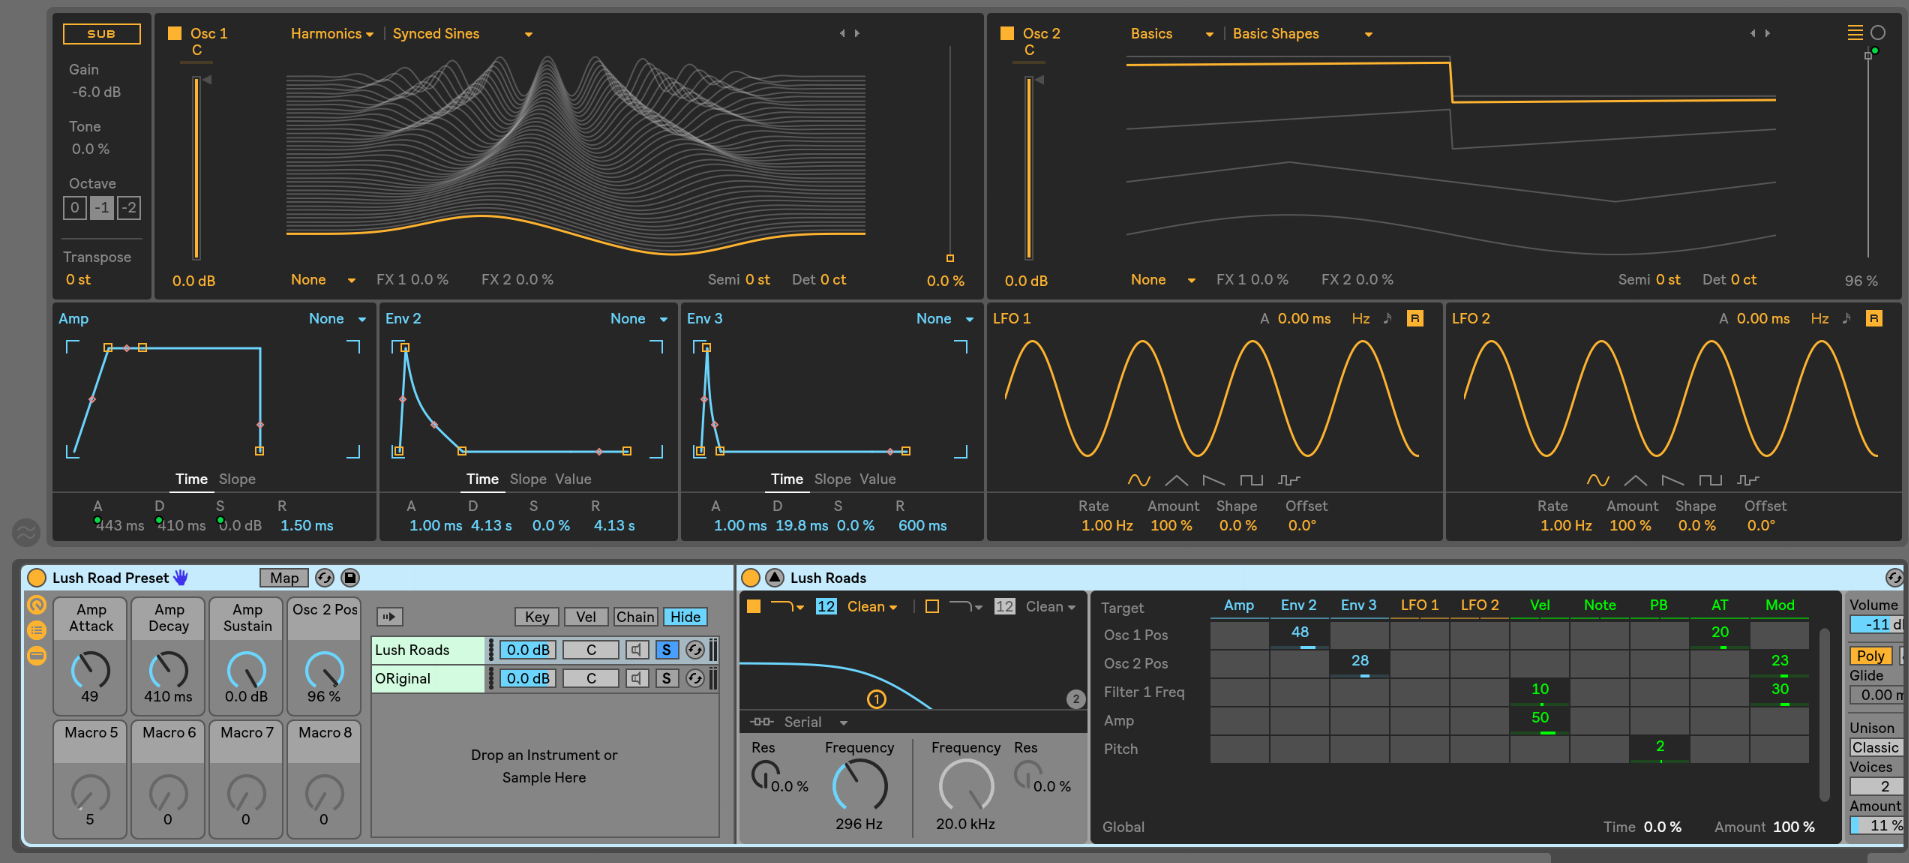
When you strike the first note, you may hear a slight “wah” sound. You can create this sound a few different ways. In this case, we can credit that nice audible chunk to the attack of envelope 2. Although it is relatively short, that “wah” sound is coming from the rising of oscillator 1’s position.
I like when sounds have an interesting quality to the attack. As a musician, we get to physically feel the creation of our notes, whether it be striking a key, plucking a string, hitting a drum head, breathing, the list goes on. As a listener, we aren’t allowed the same experience. I find that adding a touch of character to the attach of a synth goes a long way to engage the listener.
The tonal quality of the decay
Right out of the browser, this wavetable preset has an amazing decay sound. You may notice that as you hold a note out, Oscillator 1 is slowly changing its position on the wave table. This account for a slow softening of the sound that very much emulates the sound of a Rhodes.
Use Of The Stereo Field
Although this sound wouldn’t be on my top list of sounds that use a ton of stereo space, this wavetable preset does a lot with a little.
There is no detuning of the oscillators and no panning. Admittedly, these are my usual suspects for how synths span the stereo field. Instead, here we see a very gentle use of the unison effect, combined with the movement of oscillator 1’s position to create some nice stereo depth. A little bit goes a long way
What I Want To Change
The Release Time
As a keyboard player, excessively long release times give me some serious agita. I want to have more control over when the sound stops if I was using this in a live situation. This may not be the same for use in recording, but certainly, for playing, an ungainly long release time creates mud.
Control The Wah
I want to be able to control how quickly oscillator 1 reaches its peak position. Being in control of the wah will allow me to create swelling effects that could sound cool layered underneath the piano.
A Little More Grit
I want to be able to make this sound a little dirtier if I so desired. So I wish I either had control over oscillator 2’s position, or there was some sort of saturation or distortion plugin at the end of this synth.
What I’ve Done
This wavetable preset is a great starting point, but synths are meant to be played! They come with the added benefit of being able to morph sound live. So when I think about altering a preset, I do it by asking myself 2 questions. 1, What changes can I make that will help this single sound cover the most sonic range, and 2, What controls do I need to have to help me achieve that in a live setting.
ADSR
I started by mapping The Attack, Decay, and Sustain to three macros. I usually opt to set the release ahead of time and let it sit. This is mostly because before my synths leave my computer and head to the soundboard, they pass through a synth bus that has the ability to add and remove reverb, so If I need a longer tale, I am able to add it there.
Attack: I use this to give the sound a stronger initial punch. Shorter attach times make the sound more immediately present, and longer attach times make the sound swell in.
Decay: A quick decay time, used in conjunction with a shorter attack time can produce a nice plucking effect. Decay is also my go-to for creating the piano like decay sound. Now in the case of this preset, it is set up to already have a piano like decay, so having control over this parameter lets me choice whether or not I want it.
Sustain: This sound can quickly be morphed into and out of a pad sound just by turning up the sustain. So having sustain handy is always a plus.
Oscillator 2 Position
I’ve mapped a macro to oscillator 2’s position. Moving it towards the top of the wavetable creates a grittier sound. It gives me that nasty sustain that I want without introducing any audio effects. I find its always best to get as far as you can within the synth itself before you go adding any effects at the end.
Distorted Delay
Just to add a little bit of character, I added a distorted delay effect to this preset. It’s nice to start with a clean sound, that gets progressively more distorted with each repeat of the delay.
If you want to grab a copy of my altered wavetable preset, you can download it here.
Once you’ve downloaded it, join my facebook group. It’s the best way to connect directly with me, as well as with an entire community of Ableton learners who are there to help you on your journey.
Until next time, happy creating!
-Brett