In the years of running tracks, I have gone through many phases of what I thought was best.
After much reflection, I realize much of what works best is situational. Session view and arrangement view each have their own advantages.
Today, we are going to look at how to prep multi Tracks for use in Arrangement View.
If you are more interested in
Track Prep Overview
These are the steps you will go through to get a track ready for playback. Since it is a somewhat involved process, I find it helpful to start with a birds eye view and then move into details.
- Create MIDI clip markers to temporarily replace locators
- Create tempo track to lesson automation in your live performance set
- Move all tracks to session view for easy drag and drop into
arrangement - Drag stems into performance set
- Set Tempo track as master
- Insert Markers
- Add IAC loop clip at beginning and end of
song
The Details!
Create Midi Clip Markers
Start by opening your original file. This can either be something purchased from multitracks.com or something you made yourself. No matter what, the process is still exactly the same.

Add A New Midi Track to your file. You can do this quickly by pressing Command + Shift + T, or by right-mouse clicking and choosing “insert new midi track”

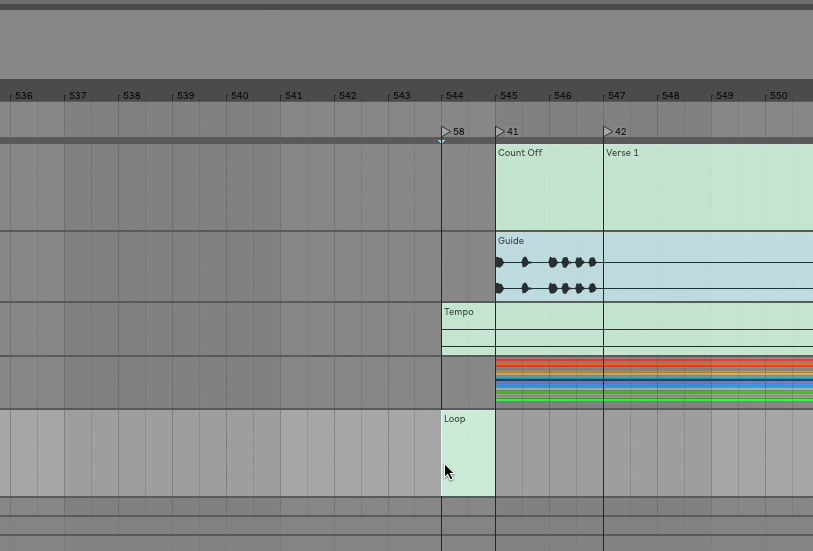
Now we need to create Midi clips spanning the length of each section of the song.
This doesn’t have to be tedious if you make use of the keyboard shortcuts available to you.
How to quickly create midi clip markers
- Press Command + Shift +Right Arrow. (To select the space between two locators)
- Press Command + M. (To create a midi clip)
- Press Command +R to Rename the clip. Rename it any given sections name. For example, “Count In”, or “Chorus”
- Press Esc to unselect.
- Press Option + Right Arrow to move to the next locator.
- Repeat steps 1-5 for the entire song.
Once you have completed this process, your arrangement will look like this.

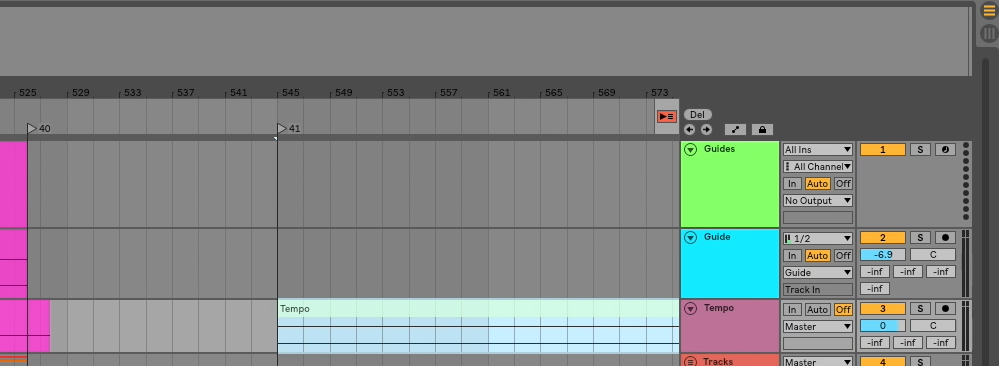
Create a Tempo Track
Most of the time, you will have songs with more than one tempo in your live set. So that you don’t need to manually automate the tempo, we are going to create a tempo track.
A tempo track is a silent audio clip, set to be the “Master” Tempo
Start by creating a new audio track.
You can do this quickly by pressing Command + T or by right-mouse clicking and selecting, ” Insert Audio Track”.
Rename that track to, “Tempo”.
Now we need to create an empty audio clip. Once you do that, you can add it to your user library so you don’t need to create one again.
Set the audio input to a silent place. For example, in my set up, I know there is no audio coming into Ableton on channels 9 and 10, so I set my audio input to be from there.
Record enable the track and record one bar of silence.

Crop your newly recorded audio clip by right-mouse clicking and choosing “Crop Clip”
Move your audio clip to the front of the arrangment

Double click the clip to reveal the clip view.
Change the end time to a high number to expand the duration of the clip.

Drag the clip to last the duration of the arrangement, and then a little more for looping at the end.

In the clip view, change the tempo track from, “Slave”, to “Master”.
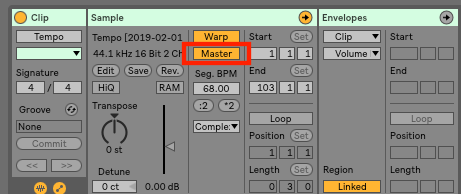
Now you can drag and drop this empty audio file into your user library for easy use later.
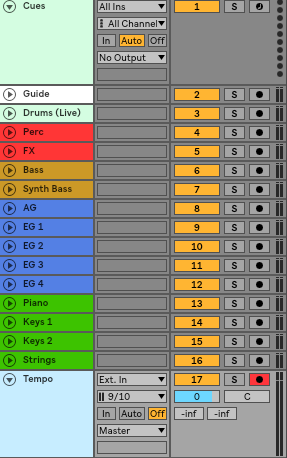
Move To Session View
Next, I like to move all my stems to session view.
Doing this allows me to drop them into my performance set one at a time, rather then having to drop the whole set in at the beginning of the timeline and then move them over.
Press Command + A in Arrangement view to select all.

Click on hold on any one track in the arrangement view, and press tab on your keyboard.

This will move you over to the session view screen. O

You will notice that there are a ton more MIDI clips than there are audio clips. That is totally fine because our cues channel is the only one that we created multiple clips of.
When we move to our performance set, those clips will line up perfectly with the form of our song.
Save your work
Now lets save this file to a place you have easy access to in Ableton’s browser.
I have one spot that I save all of my tracks so I can quickly pull them in at any point.
Drag Stems Into Your Performance Set
Start by opening the live set that you wish to perform with. I use a very similar set up for most of my gigs, so I ussually start from there.
My template looks like this.

Find a spot in the timeline and insert a marker. You can do that by pressing the “Set” button in the top right hand corner.
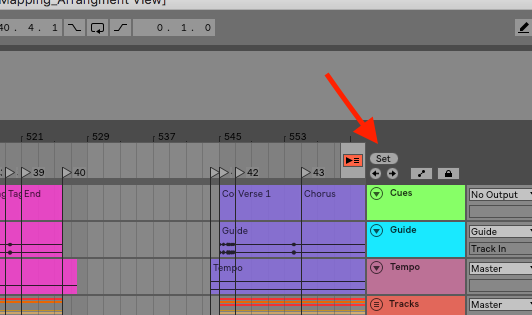
Now let’s navigate to your song in Ableton Live’s browser on the left-hand side of the screen, and open the
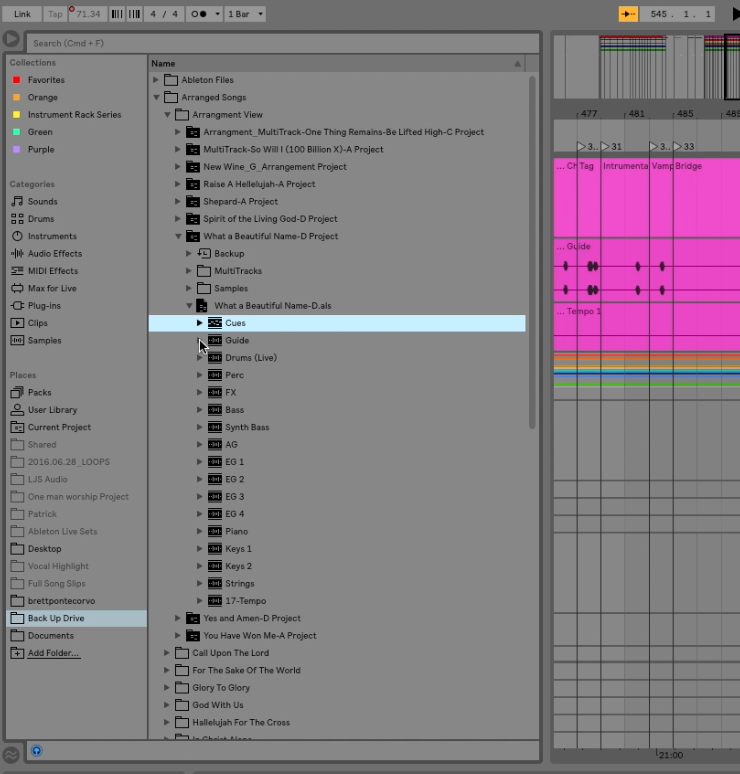
Open the drop down next to your tempo channel, and drag that audio file next to the marker you just made.
Once your tempo track is in, you will drag your audio files one by one making sure they line up with the left most marker.
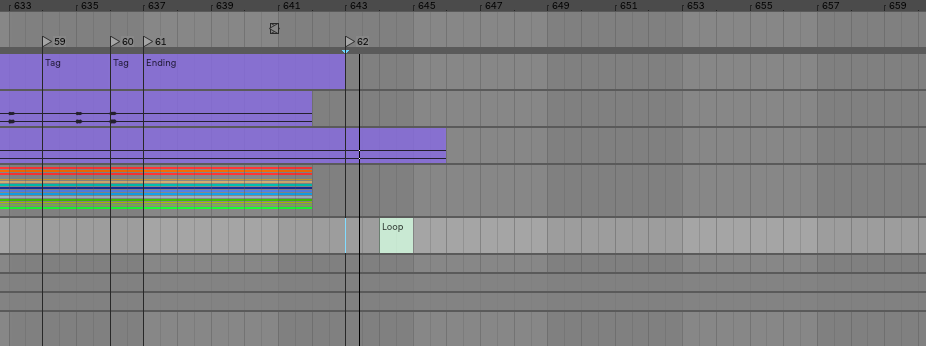
When you are done, your set will look like this.

Add Your Locators
Locators are important because they give you the ability to jump to and from sections of songs. Here is the fastest way to add them.
Press Command + K to enter Key Mapping mode.
Map any key on your keyboard to the “Set” Button mentioned above. I use the H key.
Press Command + K again to exit Key Mapping mode.
Click on the first Locator in the Midi Cues track we created.
Press Option + Right Arrow to move to the beginning of the next clip.
Press H (Or whichever key your chose) to insert a locator.
Press Option + Right arrow again to move to the next clip.
Repeat this process for the duration of the song.
Create IAC loopers
Sometimes we need the click tempo to change before we get to our count in. Similarly, sometimes we may end a song and want the click to continue even though our tracks have ended. This is where using the IAC bus is priceless.
If you don’t know how to use the IAC bus, you can check out my other post here.
Now I use a custom user template that I created for the Novation Launch Control XL to control my tracks. You can check out that set up here.
In that set up, I use Midi CC 106 to go to the previous locator. So I am going to Create a clip in my control channel that sends CC 106 to my IAC bus and place it at the beginning and end of my set.
With this
I also insert a loop clip at the very end so that once the song ends, the clock keeps on going until I either tell it to stop, or I cue the next song.
What To Do Now?
Practice makes perfect, so give this a go. I am happy to be of assistance to you if you need it!
Join the MStoAbleton community so you don’t miss out on any helpful tips and tricks to switch from Mainstage To Ableton. When you do, I will send you a free copy of my eBook, “The Fast Track Patch List Guide”. You will for sure want to have a copy of that.
As always, happy creating!
-Brett