The number one challenge I hear from members of the Mainstage to Ableton community is that they have a hard time creating smooth and easy patch changes in Ableton.
They remember how simple Mainstage makes it to have one patch die out naturally as you move to another patch in your set.
This is because Mainstage does one thing, and Ableton does many things.
Mainstage is designed almost entirely for quickly and easily switching patches. Although it does that very well, it’s been my experience that it does not hold its stability under high pressure.
Ableton is more akin to Logic Pro then it is to Mainstage in that it is a fully functioning DAW, so it needs to make space for other situations where you may not want a smooth patch change. Or a time when you might actually not want an instrument to fire at all.
What You Need To Know
There are two things you need to successfully run Ableton during a live performance; Understanding of MIDI, and the right gear to control it.
The Right Gear
Now, I always recommend learning to use what you have, but if you are just getting started and trying to pick what to use, or if you are ready to step up your game to the next level, I recommend some very specific gear.
Novation Launch Control XL
This is my favorite controller of all time. It has 8 user modes and fixed knobs, which are the best for Ableton Live. Throughout this tutorial, I will should you how I use it to run my keys sounds. You can do a similar thing with any controller, but I find this one works best
You can buy your own here.

If you buy through my website, I will receive a small commission, but it is at no extra charge to you. Also, since this is a product I use and highly recommend, I am happy to help you get set up and on the road to using it the best way you possibly can.
M Audio- Hammer 88

This is a simple weighted keyboard, but it feels amazing to play, and pairs really well with the Launch Control XL. If you are in the market for a new keyboard, this is the way to go.
The VERY basics of MIDI
Understanding patch changes makes a ton more sense when you understand how digital instruments work in the first place. Here is an exceptionally vast over simplification of MIDI.
MIDI stands for Musical Instrument Digital Interface. It is essentially a collection of messages sent from your controller, to your computer, to your instrument.
Every note you play sends a message that looks like this…
Note On –>Note Name –> Note Velocity –>(Maybe aftertouch) –>Note Off
By now you might be getting the larger picture which is that your notes are cut off suddenly, or sustain indefinitely because somewhere along the line, your MIDI message wasn’t carried to completion.
Incomplete Midi Messages are the enemy of smooth patch changes
The Common Thread
Smooth patch changes occur not by something fancy at all, but by re-routing of Midi Messages, in a way that allows midi to be sent to a new sound, but still allows the midi off
For example. If you have a piano patch, and you are switching to an organ patch. A smooth transition between sounds will function like this
Notes are played on the piano patch.
Piano sound is sustaining.
Midi is routed away from your piano to the organ
The Midi note off message is sent to your piano when you lift the keys
Newly played midi goes to the organ patch.
Mainstage does this for you behind the scenes.
In Ableton, this is accomplished using instrument racks and chain selectors.
Smooth patch changes In Ableton
For the purpose of this article, I am creating what I like to call a dynamic patch list. That means it is made up of On/Off switches that can be triggered at any point in time. The same principles apply to any type of patch list however.
Setting The Scene
We are going to use 5 patches for this walk through
- Piano
- E Piano
- Pad
- Synth Lead
- Pluck arp
Phase One: Instrument Channel Strips
Start by creating 5 midi Channel strips

Add an instrument rack to each channel strip
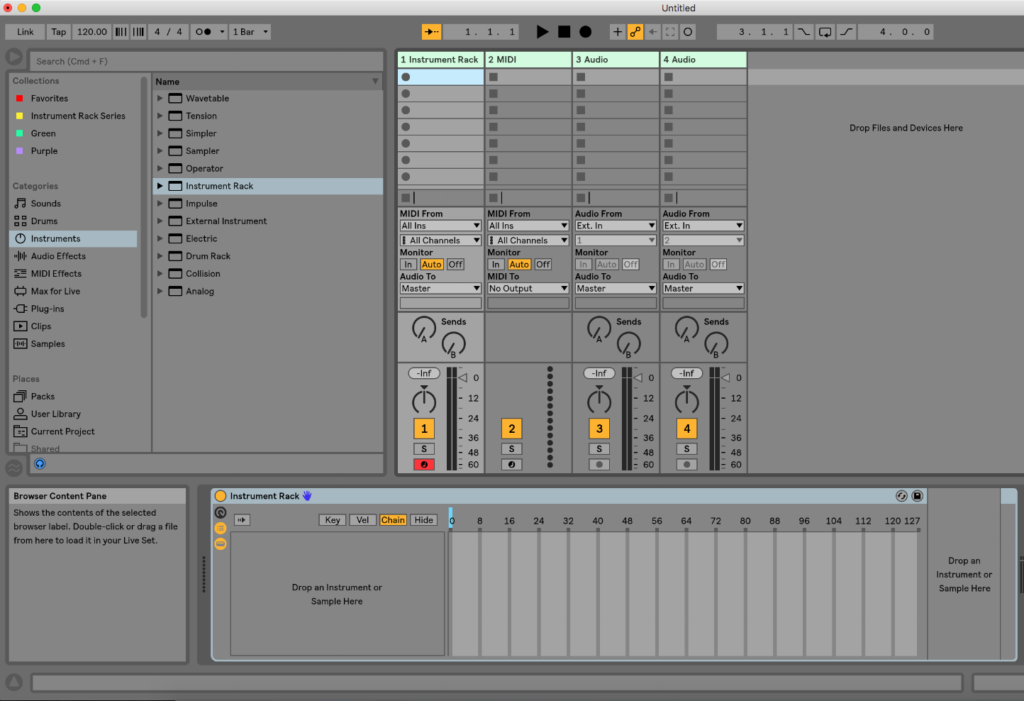
Add a patch to each instrument rack
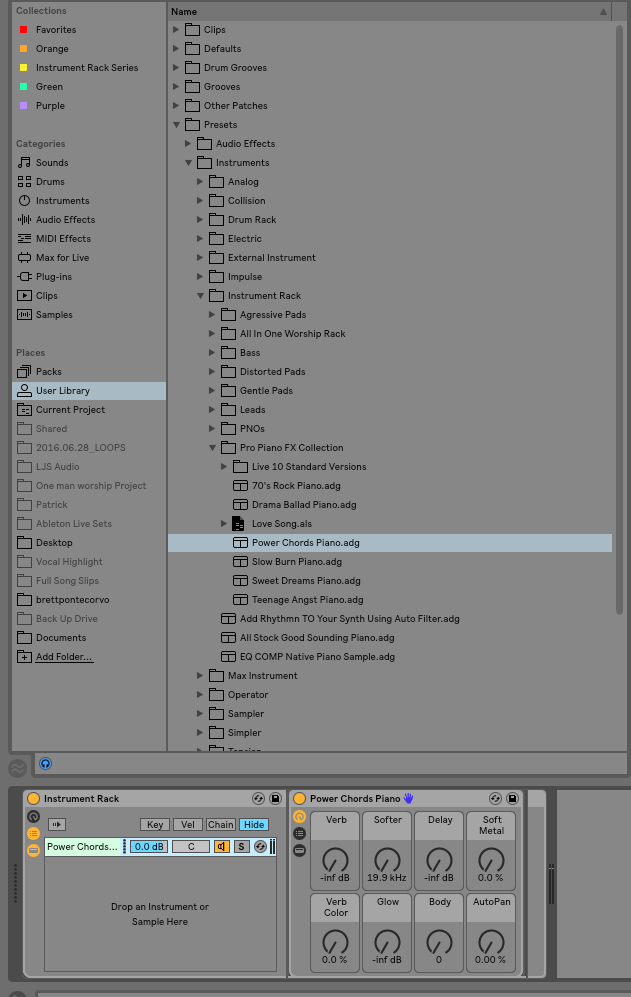
Navigate to the chain menu, and move each chain from position 0 to position 1
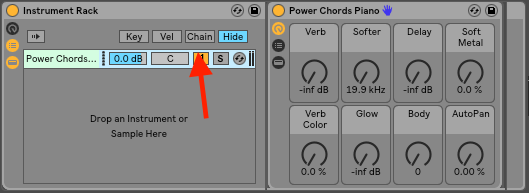
Enter Midi Mapping mode my pressing Command-M on your keyboard, or clicking the midi button in the top right hand Corner

Map A button on your controller to the chain selector of each instrument rack.

Adjust the minimum range to 0 and the maximum range to 1

This makes it so that you have created an on/off switch that allows your sounds to decay naturally as you let go of each patch
Phase Two: Audio Bussing
To easily control your sound in Ableton, we must use an audio buss. Since we don’t have patch by patch control, this is the best way to have seamless sounds in Ableton
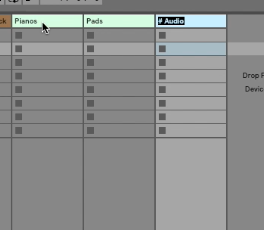
Create 3 Audio Channel strips by right mousing clicking and choose, “I
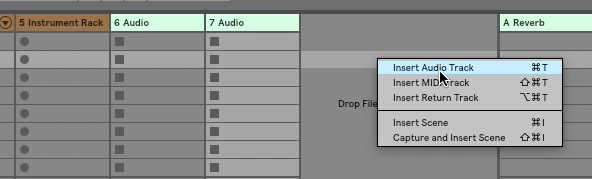
Label the strips, Piano, Pads, Leads.
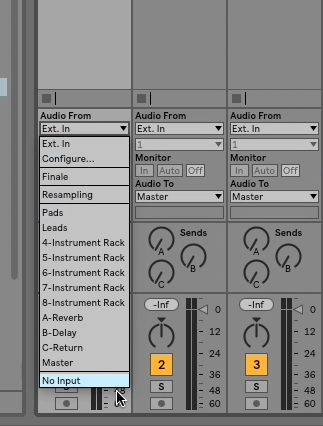
Set the audio input to none.
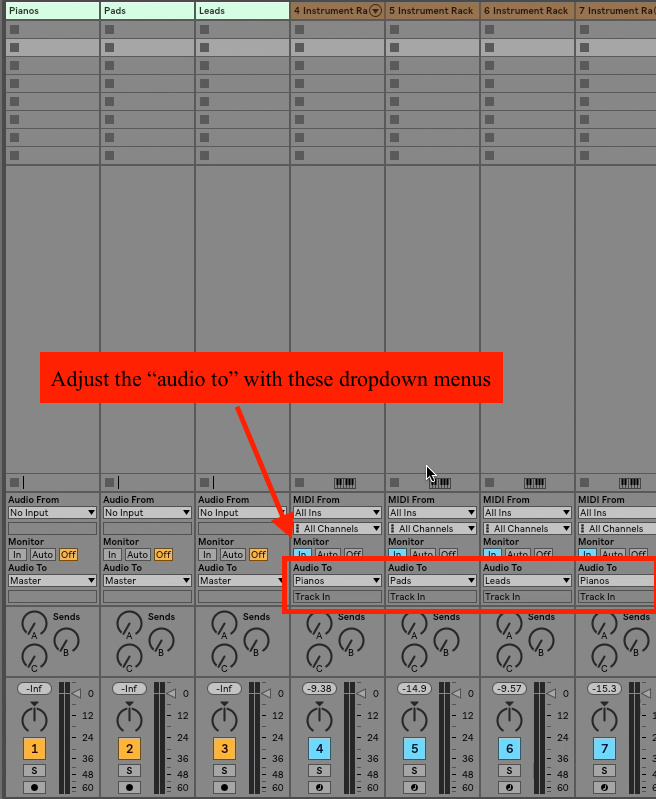
Now return to your patch channel strips. Change the “audio to” to the appropriate audio buss channel by using the dropdown menu.
Pianos to the Piano bus, Pads to the Pad Bus, And Leads to the Lead bus.
Phase Three: Mapping and Audio Effects
In this walkthrough, I am going to put the same effects in each audio bus. I highly encourage you to think about what other effects might be appropriate for your specific situation.
For example, on one of my live sets, I use the, “Pedal” device to add some drive to my pads.
You can do the same, or come up with your own ideas.
Performance effects
- Auto Filter
- Reverb
- Dynamic Tube, Hot Driven Tape
Add these three effects to your piano Buss by dragging them one by one and dropping them on the channel strip.

Once you’ve added in your effects to each channel strip, its time to map them
Enter midi mapping mode as we did earlier by using command-M or clicking the midi button in the top right of your screen.
First, Map All three audio bus volume faders
Next, Map the dry wet knob of the reverb to a knob on your controller
Then, Map the Auto filter frequency to a knob on your controller
Last, Map the dry wet knob of the dynamic tube to a knob on your controller
Remember to do this for each channel.
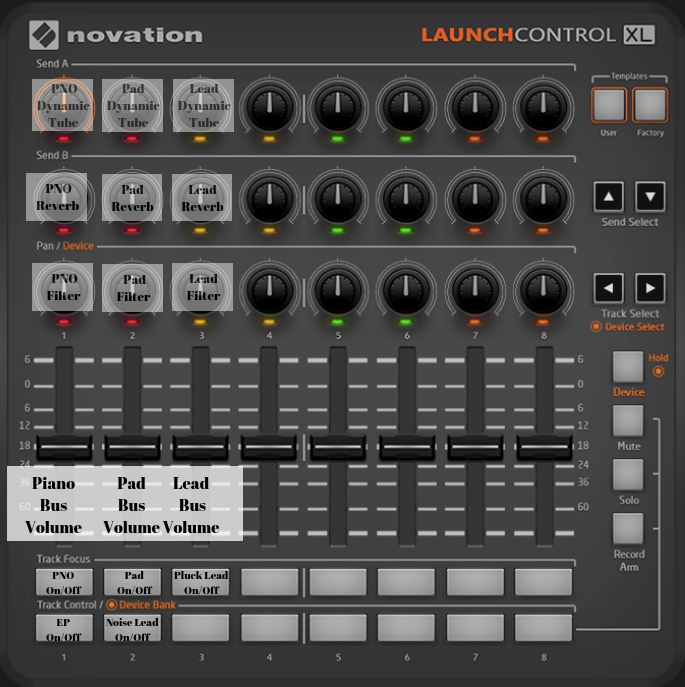
My mapping layout looks like this.
In Practice
You have just built a dynamic patch list. Using it will take some practice but it is well worth it. You now have the ability to bring sounds in and out using buttons, and to alter them using your mappings.
Practice moving through sections of your songs using this method. I give a demonstration of how this works in the video at 14:38 in the video.
What to do now?
Start building a dynamic patch list that works for you. If you master this, you will have an Ableton set that you can use in most situations, and you will become very comfortable on your instrument because of the consistency this type of a patch list provides
Opt-in to the Mainstage To Ableton Community! Every single Tuesday and Saturday I release new content that is going to help you become the best that you can be using Ableton as your live performance instrument. Being plugged in sets you up for success and growth. Not to mention that I often send my subscribers exclusive presets and info. Make sure you are a part of it all.
I look forward to connecting with you
As always, happy creating!
Until next time,
-Brett