Using Automation in session view is a great way to add life to your currently playing clips. Also, making use of the ability to link and unlink notes and envelopes, you can create interesting and non-standard patterns that don’t necessarily sound like a loop.
Also, using the IAC bus, automation can act as a way to “store” your timeline based effects.
No matter what the reason, mastering session view automation is going to bring your ideas to life. It can take something that sounds okay, and make it sound awesome.
What Can Be Automated?
Almost anything can be automated in Ableton Live. As a rule of thumb, if you are able to map a parameter to a midi controller, you are able to automate that parameter.
There is only one limitation, and thankfully that limitation has a workaround.
You can only automate parameters that are on the channel strip you are currently working with.
If you have four channels of instruments, you cannot use channel 1 to change the volume of channel 4. That must be done by a clip on channel 4.
The one exception to this is if you are employing the use of the IAC bus. In which case, through internal midi mapping, you can use one clip to control any number of parameters you would like across as many channel strips as you would like.
Finding The Envelopes Window
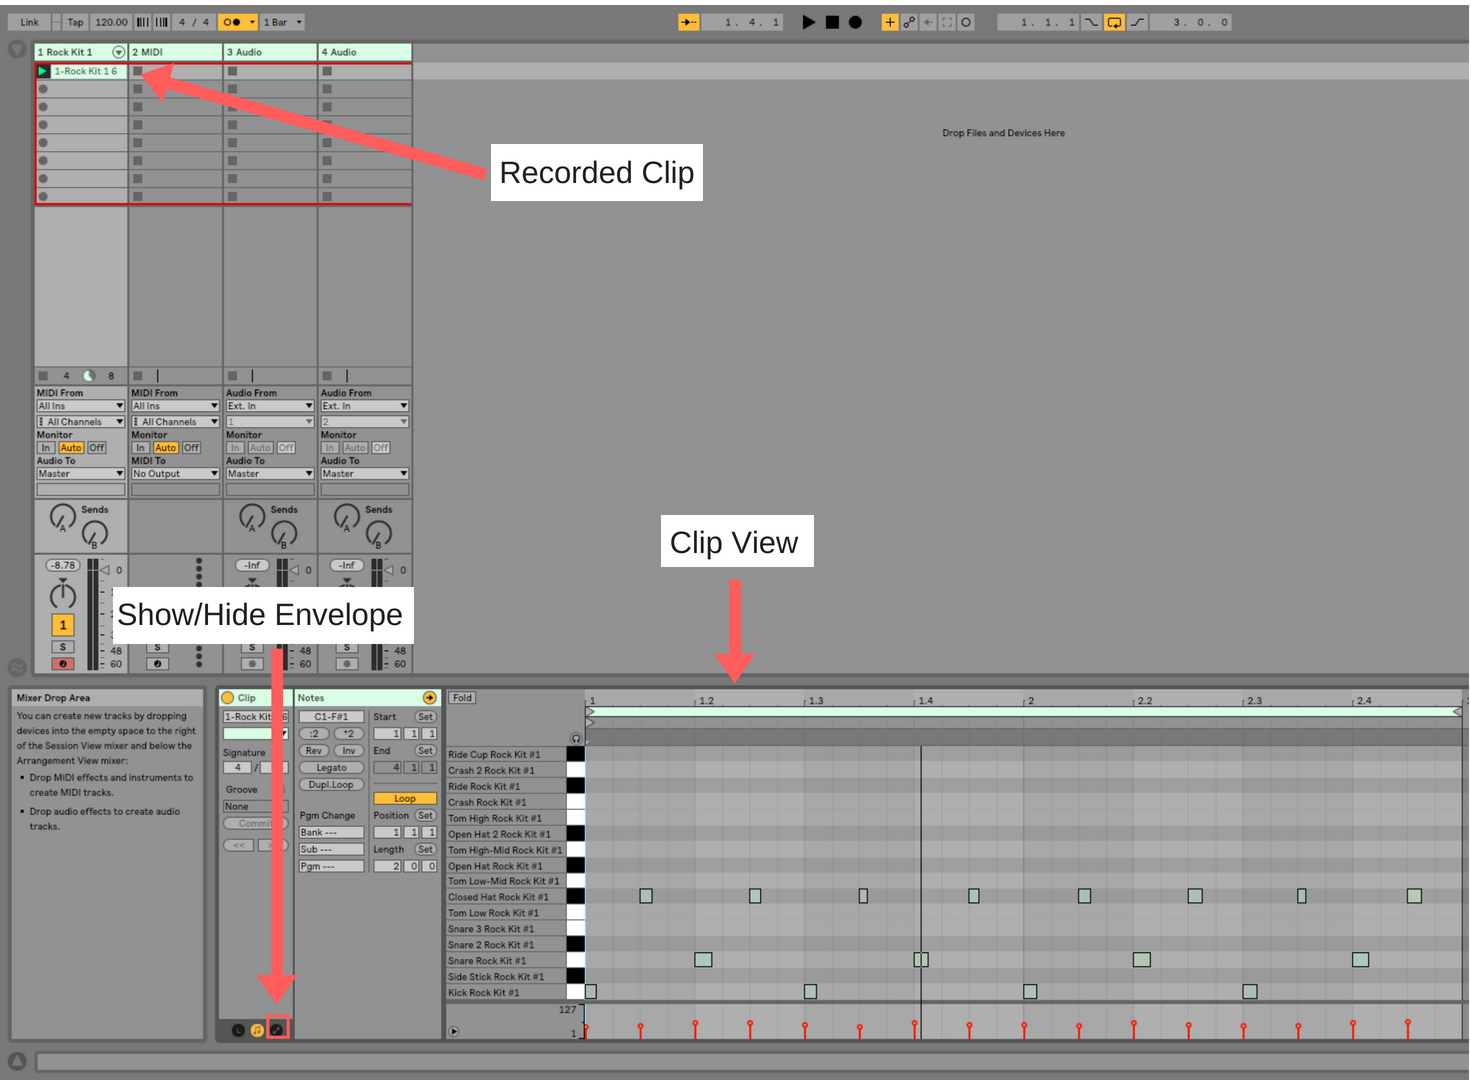
Once you have recorded a midi or audio clip, double-click that clip to open it in clip view.
To toggle between music content, and instruments or audio effects, you can simply use the keyboard shortcut, command-tab.
Make sure your envelope window is viewable by clicking the show/hide menu item at the bottom left of the screen.
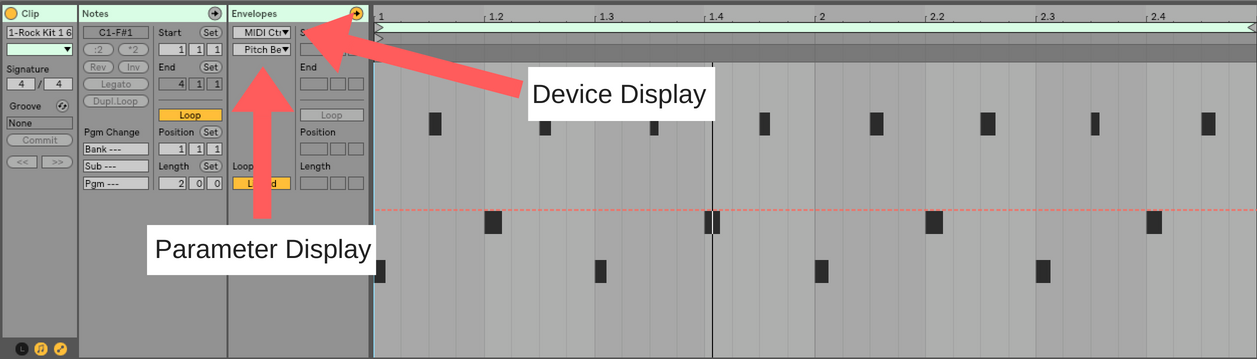
Find The Parameter You Want To Map In The Envelope Window
You will notice that there are two drop-down menus. The top one displays the device, and the bottom one displays the automatable elements of that device.
You could use your eyes and find the device and parameter you want to automate. I find this to be clumsy and inefficient.
The fast way to do this is to:
- Use the shift-tab shortcut to toggle to the device view.
- Click the parameter you want to automate.
- Shift-tab back to the envelope window
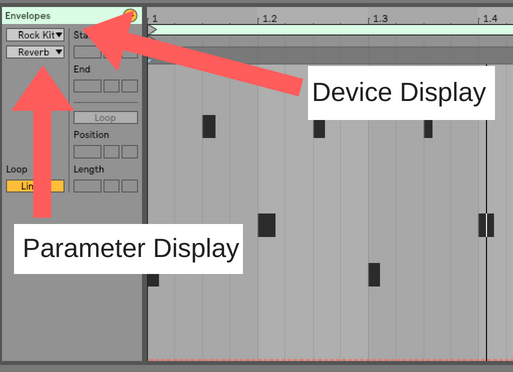
Upon arriving at the envelope window, you will notice the device and parameter you clicked on will automatically be displayed
That’s a time saver.
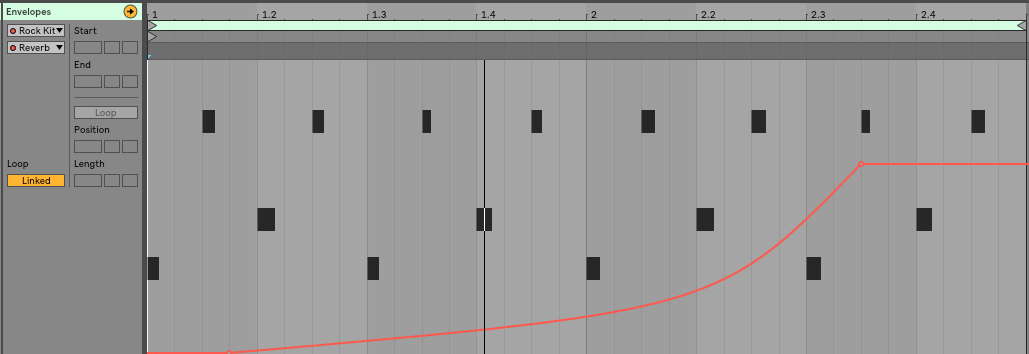
Why The Dotted Line?
Dotted lines show where the devices parameter currently is set and indicates that currently no automation has been recorded for it.
Clicking anywhere on the dotted line will:
- Create a breakpoint.
- Record automation into that clip
- Allow you to change the value over time by adding additional breakpoints

You can click and drag to move your breakpoints anywhere on the grid. You can create curved lines by holding down option and dragging your line in any direction.
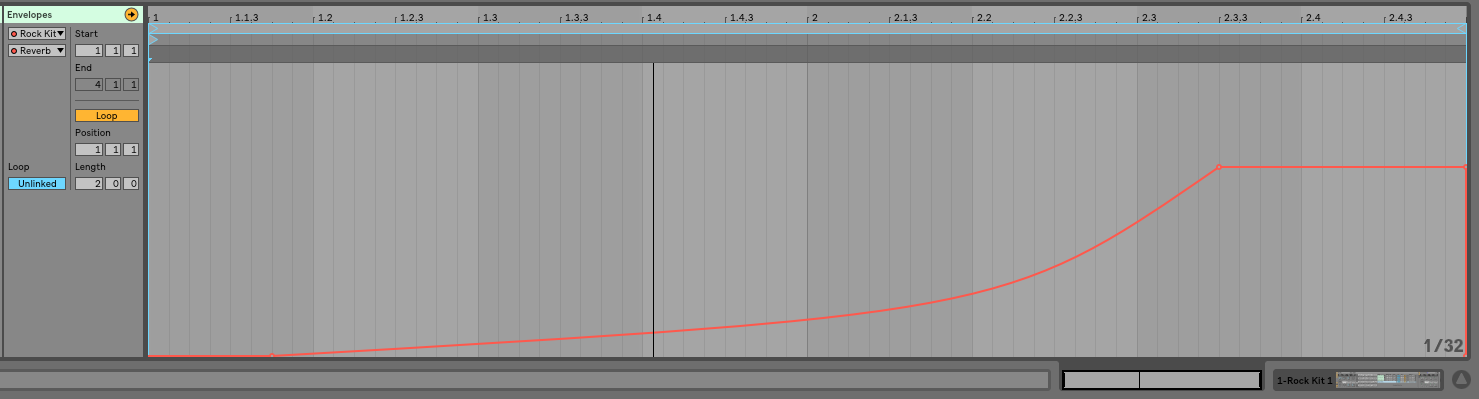
Linking and Unlinking Parts
Session view allows you to create envelope start, end, and looping points independently of the note start end and looping points. It also allows you to loop, or not loop envelopes independently of notes on the clip.
In addition, you can link or unlink envelopes for different parameters separately. Some automation can follow the clip, while others are unlinked
This can be particularly useful if you are using automation to gradually fade in an effect. Once the effect reaches its desired level, you can either loop that portion of the automation as the clip continues, or set the envelope to not loop so that once the parameter reaches the desired value, it ends.
Unlinking Envelopes
Step 1: In the envelope window, click, “Link”. Once clicked, it will toggle to display, “Unlinked”.
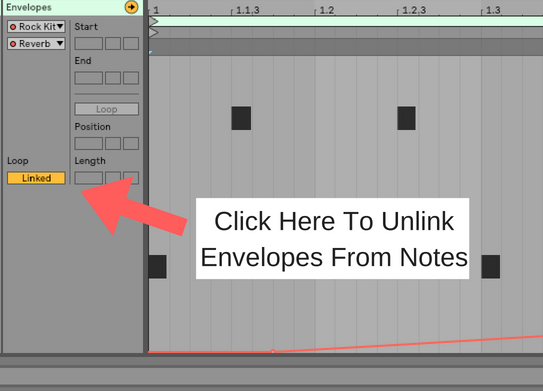
When you do this, you will notice that the top of the envelope window will now display blue (depending on your theme) loop bars, and start end markers.
Step 2: Click and drag your envelope start, end, and loop bars to your liking.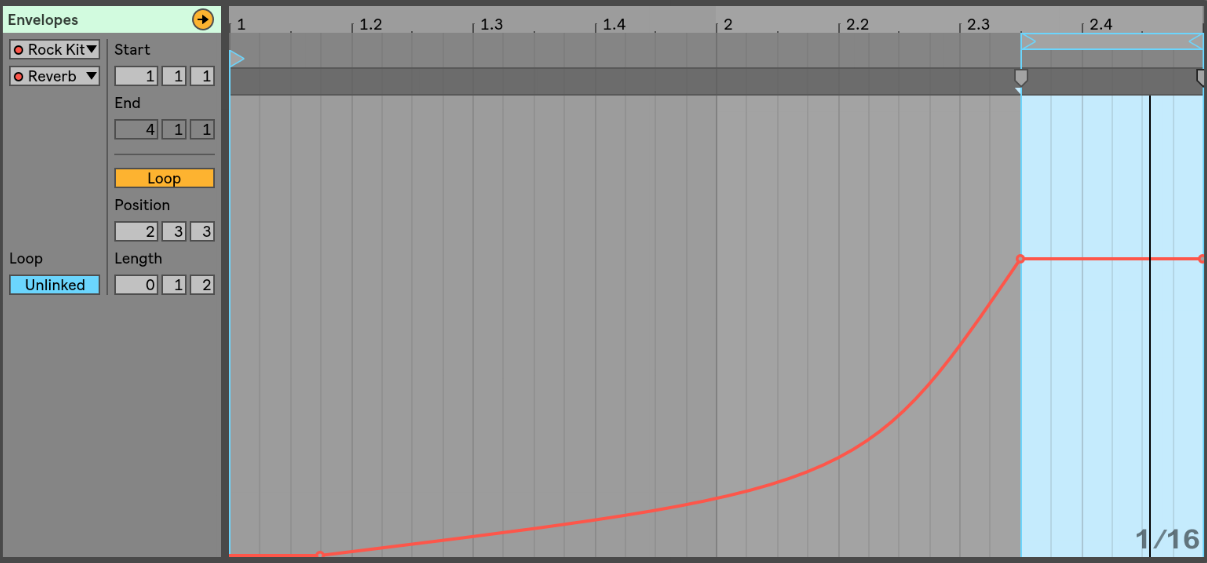
Step 3: Test to make sure that it worked!
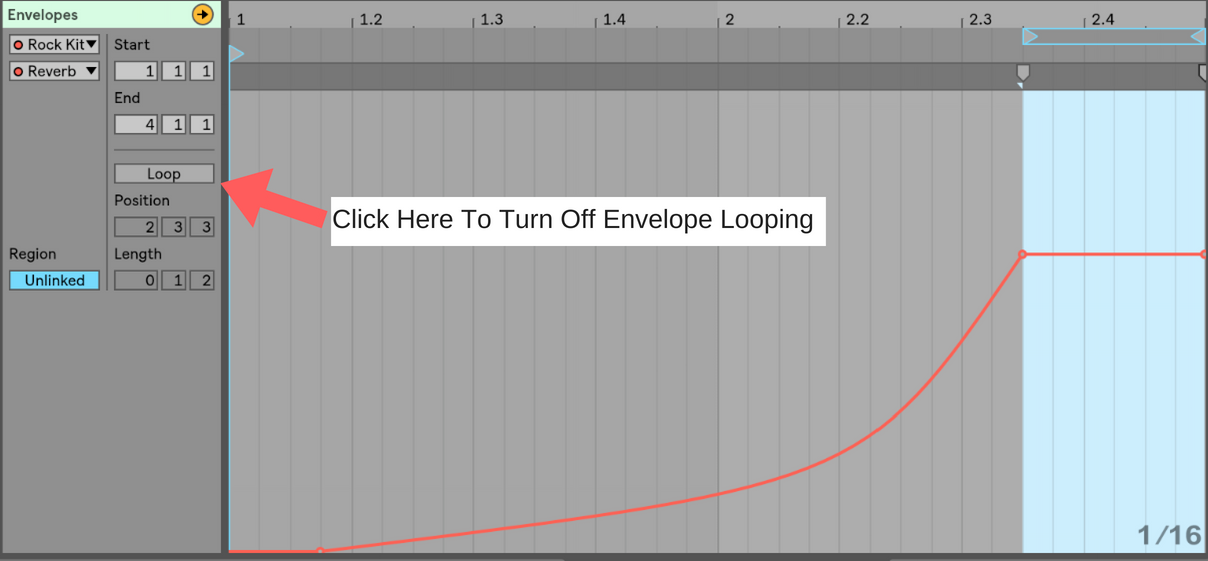
One Shot Envelopes
With unlink enabled, click the loop button in the envelope tab to turn envelop looping off.
Alright, now go make something you’re proud of!
To connect directly with me, as well as with a whole community of Ableton learners, join the Mainstage To Ableton Facebook group. It’s the best place to give and receive support for all of you Ableton needs.
Until next time, happy creating.
-Brett