Shimmer reverb has turned into such a buzz word. It shows up everywhere and produces an awesome effect. But what is it?
Essentially shimmer reverb is a course pitch-shifting device paired with a reverb.
The shimmer effect is achieved by creating a feedback loop between the two devices. In
Building Our Shimmer Reverb
Start by creating two new send tracks.
You can do this by
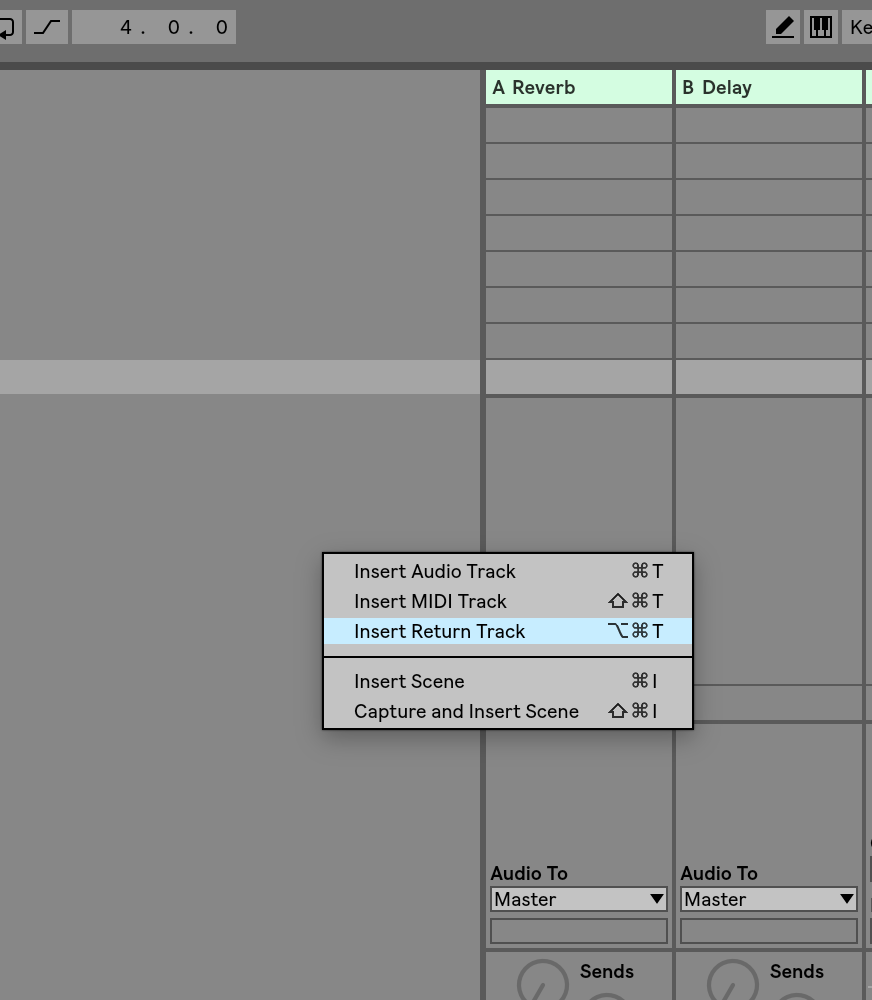
Rename the first return track, “shimmer verb” and the second, “shimmer d
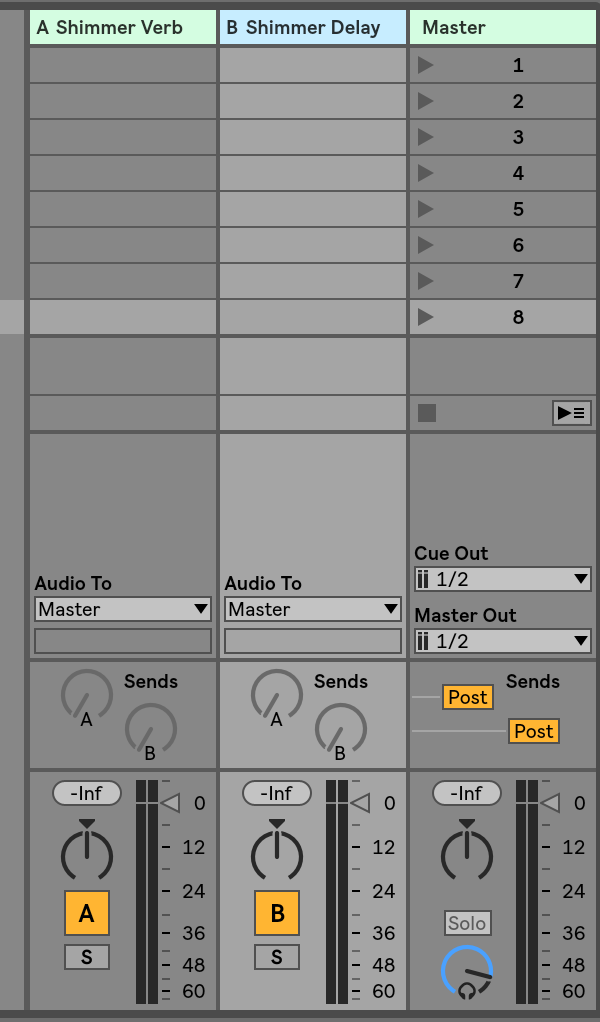
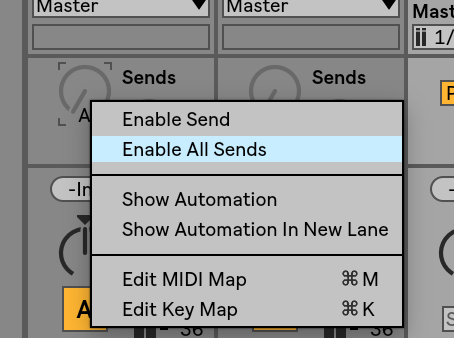
Now we need to create our feedback loop. We are going to do this by sending audio back and forth between the two return tracks we just created. This feature is disabled by default in Ableton, but we can activate it by right mousing clicking on our sends. So let’s take a second to do that now.
Activate the sends on the return tracks by right mouse clicking and choosing activate sends.
Pitch Shifting
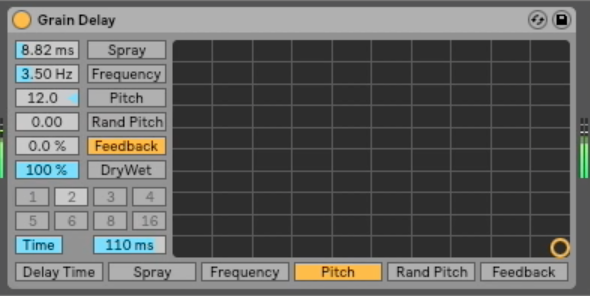
Start by adding the device, grain delay to your delay return.
Set the pitch slider to +12. Transposing one octave is sufficient because our feedback loop will cause it to transpose the audio several times in reality.
Change the Spray to about 9 ms
Set the frequency at about 3.5 Hz
Send a little audio to your return track from an instrument of your choice.
Now when you play you will hear a slightly delayed sound pitched up an octave.
Here are the settings I used, for reference.
It sounds very computerized right now. So we will need to smooth it out.
We will do that with our reverb.
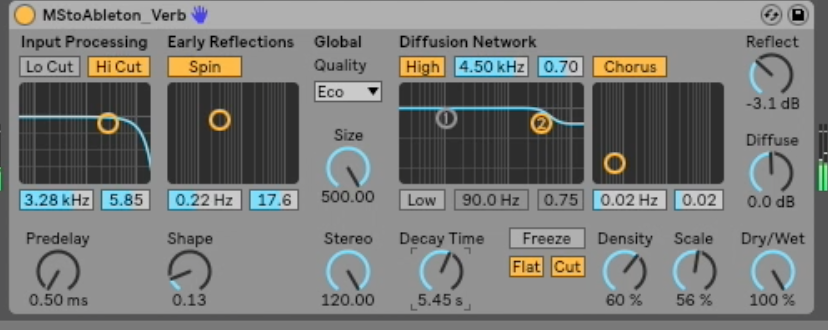
Reverb
We want our reverb to be warm sounding and tone the grain delays very fake sound down a bit.
With the in mind, here are the settings I use.
If you want to see the whole set up in action, here are all the juicy details about how I set up my reverb.
Pre vs. Post
To create that smooth glowing shimmer effect we have all come to love, we actually only want to hear the sound that is coming out of the reverb. That leaves us in a bit of a pickle though, because, in order to have sound to send to the reverb, the grain delay must be producing a signal.
This is where pre-fader and post-fader are our allies.
Pre-Fader means the amount of volume sent from the knobs on your channel strip is not
Post-fader means the amount of volume sent from the knobs on your channel strip is affected by the volume slider at the bottom of your track.

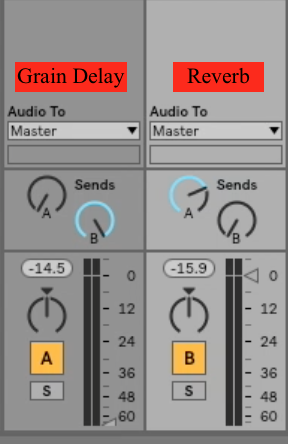
Set your grain delay channel to be pre-fader, and your reverb to be post-fader.
Then turn the volume on your grain delay all the way to zero.
Turn the send on your grain delay to the maximum value.
Then adjust the amount of send on your reverb to your liking. Here are the values that worked for me.
In Use
Now to create the shimmer effect, you will want to send audio to the Grain delay only. Since we created a feedback loop, your ears will hear the full effect of the shimmer reverb without needing to send audio to both channels.
What to do now?
Grab a copy of the the quick synth map. Sound design is so important for every keyboardist, so make sure your skills are up to par.
If you’re looking for a solid way to set up a patch list in Ableton, you can check out this past article here.
Until next time,
Happy creating!